|
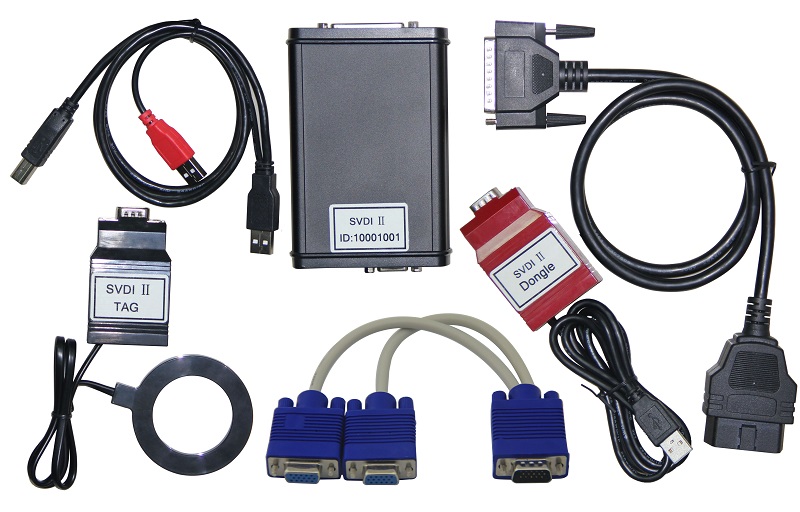
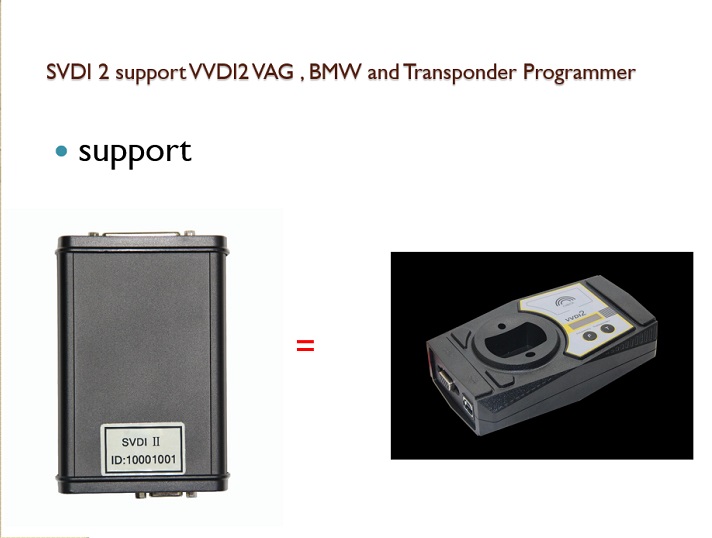
SVDI2 support VVDI2 VAG,BMW and Transponder programmer
SVDI2 - VAG User Manual
1. Document Declaration. 1
2. Overview.. 1
2.1. Noun explanation. 1
2.2. Options. 1
2.3. Diagnostic Function. 2
2.4. Key Learn. 2
2.5. Special Function. 2
3. Options. 3
3.1. Language. 3
3.2. Diagnostic parameters. 3
4. Diagnostic Function. 4
4.1. Identification. 4
4.2. Read/Clear DTCs. 5
4.3. Coding. 6
4.4. Actuator test. 7
4.5. Security access. 7
4.6. Customer Requests. 8
4.7. ECU Flasher. 8
4.8. UDS Adaption. 9
4.9. Advance Measure Value. 10
4.10. Basic Settings. 10
4.11. Adaptation. 12
4.12. Measured Values. 13
5. Key Learn. 13
5.1. 4th immobilizer system.. 13
5.1.1. 4th immobilizer system – Instrument cluster. 14
5.1.2. 4th immobilizer system – Passat /CC. 22
5.1.3. 4th immobilizer system – Touareg/Phaeton/A8/Cayenne/Bentley. 27
5.1.4. 4th immobilizer system – Audi A6/Q7/Allroad. 28
5.2. 5th immobilizer system.. 31
5.3. Key Learn. 36
5.4. Remote Key Adaptation. 42
6. Special Function. 43
6.1. Engine control unit. 43
6.2. K-Line Instrument/Immobox. 46
6.3. Change KM.. 49
6.4. Adapt Unit. 51
6.5. Component Protection. 57
6.5.1. Generation 1 component protection. 57
6.5.2. Generation 2 component protection. 60
6.6. EEPROM Dump Tool 63
1. Document Declaration
Please view the following declaration carefully:
u SVDI2 – VAG User Manual can help you maintenance vehicles with SVDI2 device. Please DON’T used for illegal purpose, Please follow the national law
u SVDI2 – VAG User Manual is written by SVDI2, please DON’T used for commercial purposes without authorize
u SVDI2 – VAG User Manual can help you how to use VAG software, please view carefully
u Any illegal use SVDI2 – VAG User Manual, illegal use SVDI2 device, The user should take all risks, the company does not assume any responsibility
2. Overview
2.1. Noun explanation
u VAG: Volkswagen Group, it have many brands, such as: VW, Audi, Skoda, Seat, Porsche, Bentley, Lamborghini etc
u Component security: Sometimes we call it component security bytes. Usually we use CS to express. This data usually use in car immobilizer, ECU and key
u PIN: PIN code, Login, Login code etc. It can use to login module before key learn and adapt device etc
u Component protection: It’s a protection type for unit module. Many modules on Audi A4/A5/A6/A8 use this method to bind module to gateway. If you install a 2nd hand module (has component protection) to new car, you must learn it to new vehicle before it work. Reset to virgin module, learn to new vehicles
u Lost all key: The car lost all working key, there is big different from add key with working key. Note: before OBDII communication, you need open dangerous light, press on the brakes for several times to active OBD communication
2.2. Options
Detail can be found in chapter 3 Options
u Choose Language
u Diagnostic parameters
2.3. Diagnostic Function
Detail can be found in chapter 4 Diagnostic Function
u Identification
u Coding
u Actuator test
u Read DTCs
u Clear DTCs
u Basic settings
u Security access
u Adaptation
u Custom requests
u Measured values
u Advance measure values
u ECU Flasher
2.4. Key Learn
u 4th immobilizer system: Detail can be found in chapter 5.1 4th immobilizer system
u 5th immobilizer system: Detail can be found in chapter 5.2 5th immobilizer system
u Key Learn: Detail can be found in chapter 5.3 key learn
u Remote Key Adaptation: Detail can be found in chapter 5.4 Remote Key Adaptation
2.5. Special Function
u Engine Control Unit: Detail can be found in chapter 6.1 engine control unit
u K-Line Instrument/Immobox: Detail can be found in chapter 6.2 K-Line instrument/immobox
u Change KM: Detail can be found in chapter 6.3 change KM
u Adapt Unit: Detail can be found in chapter 6.4 adapt unit
u Component protection: Detail can be found in chapter 6.5 component protection
u EEPROM dump Tool: Detail can be found in chapter 6.6 EEPROM dump tool
3. Options
3.1. Language
Support following languages:
u Chinese (Simplified)
u English
Please manual set user language after first run program
3.2. Diagnostic parameters
Set diagnostics connect protocol type (PICTURE 3.1). This will only be use at diagnostics function. While scan all unit, close unused protocol will enhance scan speed
u CAN resistor: Generally, there is impedance between CAN High PIN and CAN Low PIN. If you connect to car directly, the gateway will finish this job. But if you want connect on a bench or connect to unit directly, SVDI2 will finish this job as your select value
u K-Line parameters:
K-Line try baud rate sequence: Diagnostic K-Line unit have 2 different baud rates. You can set which baud rate can be test first. Some old module may need wake up by initialize 2 times. You can try with change baud rate sequence. K-Line use OBDII PINs: Set K-Line use PIN. If select 7 PIN, it will be always try first K-Line connect parameters: Set K-Line timer while initialize and communication
(PICTURE 3.1)
4. Diagnostic Function
Support TP2.0, UDS, KWP1281, KWP2000 protocol, It can display item detail information with offline database (PICTURE 4.1)
(PICTURE 4.1)
u Show all unit: Show all support unit list
u Gateway installation unit list: Get installed unit list from gateway
u Scan all unit show in list: Scan all unit list in (PICTURE 4.1), you can enhance scan speed by set diagnostic parameters
u Clear All DTCs: Clear all trouble codes in list unit, you need scan it first
u Connect input unit: Connect the input unit directly
4.1. Identification
Read the basic information for target unit: VAG number, HW/SW version, coding, system decryption, equipment number, importer number, workshop number etc. Example: diagnostic instrument with UDS protocol
(PICTURE 4.2)
(PICTURE 4.2)
4.2. Read/Clear DTCs
Read DTCs: The read trouble codes have detail explanation; you can select Read Freeze Frame Data for the DTC environments Clear DTCs: clear trouble codes in module (PICTURE 4.3)
(PICTURE 4.3)
4.3. Coding
Set target unit coding, we have database for most of the module, you can change coding by select item (PICTURE 4.4)
(PICTURE 4.4)
4.4. Actuator test
Test every small actuator in target unit, UDS protocol support selective tests, other protocol support sequential tests (PICTURE 4.5)
(PICTURE 4.5)
4.5. Security access
Login module with PIN code, usually use before adaptation. You can complete many useful function with this, example: learn new key, remote control, change 2nd module (old type) etc (PICTURE 4.6)
(PICTURE 4.6)
4.6. Customer Requests
You can write your own commands to target unit (PICTURE 4.7)
(PICTURE 4.7)
4.7. ECU Flasher
Support flash ECU with original flash file: odx, frf, sgo. Update your module to newest software version. For ECU flash ECU may change the power class, it depends on the flash file you use. (Base on this feature, you can change ECU from 1.8T to 2.0T with suitable flash file). Note: Before flash ECU, you need switch ON ignition with working key or the target module with IMMO OFF status. Of course, if the target unit is none about immobilizer, there’s no limit for flash ECU (PICTURE 4.8)
(PICTURE 4.8)
4.8. UDS Adaption
Set new value in channel for model use UDS protocol (PICTURE 4.9)
(PICTURE 4.9)
4.9. Advance Measure Value
View detail measure value in target model. Mainly use for UDS protocol (PICTURE 4.10)
(PICTURE 4.10)
4.10. Basic Settings
Complete basic settings for target unit. If you install new module to car, usually require this function to configuration the new module. Usually you need run “Security Access” first. Example: This is K-Line ECU module (PICTURE 4.11), (PICTURE 3.12)
(PICTURE 4.11)
(PICTURE 4.12)
4.11. Adaptation
Complete learn key, learn remote, learn new module etc (PICTURE 4.13). Usually you need run “Security Access” first
(PICTURE 4.13)
4.12. Measured Values
View the detail information from channel. Usually use for CAN and K-Line protocol (PICTURE 4.14)
(PICTURE 4.14)
5. Key Learn
5.1. 4th immobilizer system
VW/Audi/Skoda/Seat/Porsche/Bentley vehicles all have 4th immobilizer car. (How to verify new key is dealer key? Key is learned success or not? Transponder is correct or not? Car ignition switch is work fine or not? About this you can find answer for Immo status in “Key Learn ->Key Learn”) Support following types:
1. Instrument - CDC3217/CDC3297/CDC3272 + 24C32
2. Instrument - NEC+24C32
3. Instrument - NEC+24C64
4. Instrument - NEC+24C64 (2013-)
5. Instrument– NEC+24C64 (2012 TFT color display)
6. Instrument– NEC+24C64 (2013 TFT color display)
7. Instrument– NEC35xx
8. Instrument– NEC+95320
9. Instrument– Motorola 9S12XHZ512(Golf6 MM7 – 2011)
10. Instrument– NEC+95320(Johnson Controls)
11. Instrument– NEC+95320(JCI – 2013 Bora/Jetta)
12. Instrument– Visteon
13. VW Passat B6/B7/CC Key Learn
14. Touareg/Phaeton/A8/Cayenne/Bentley 4th immobilizer
15. Audi A1 – NEC+24C64
16. Audi A3/TT/R8 – CDC3217/3297 + 24C32
17. Audi A4 – instrument Crypto RB4 (2001+)
18. Audi A4 –instrument Crypto RB8 (2004+)
19. Audi A6/Q7/Allroad – EZS-Kessy
20. Audi Q3
5.1.1. 4th immobilizer system – Instrument cluster
Support function: read/write EEPROM, read/write FALSH (part support), change KM, add key, read START/STOP key data etc SVDI2 – VAG provide auto detect cluster login type. 4th immobilizer cluster use MEGAMOS 48 transponder as key, see the following explanation:
u Diag: We can auto detect cluster login type here, support CAN and UDS protocol. If auto detect error, please send diagnostic results to your dealer by enter unit 17 instrument cluster (PICTURE 5.1)
(PICTURE 5.1)
u Read EEPROM/FLASH: Read EEPROM or FLASH via OBDII. Read FLASH is only part support, not support by all type (PICTURE 5.2)
(PICTURE 5.2)
u Save File…/Load File…:Save data read by OBDII (EEPROM, FALSH, Immo data etc) / Load file to buffer
u Read Immo Data/Write Immo Data: Read immo data from cluster/ Write immo data to cluster. Immo data is very important, you can prepare a dealer key with “Key Learn-> Immo data prepare key”, learn key with immo data etc. There are different values for each login type. You must backup original immo data before write immo data, and we don’t recommend generally user do this operation. If you know the immo data very well, you can complete some advance function with write immo data, example: fix car stop working suddenly
u START/STOP key data: It can save useful data to a encrypt file. Write this file to
another SVDI2 product (Keyless/Remote Start device), the car will have keyless function, remote start function etc. (There’s no immo transponder inside car. It’s safe as original)
u Reset Instrument: Make instrument exit from service mode. And if you change KM, the new KM will show on cluster after reset instrument
u Make Dealer Key: Prepare a new dealer key, see detail in Make key steps for 4th immobilizer cluster
u Add Key: Add new dealer key to immobilizer cluster, see detail in Make key steps for 4th immobilizer cluster
u Service mode: (PICTURE 5.3), All login type have similar operation for lost all key, backup ABS coding->read EEPROM with BDM programmer->Prepare a service EEPROM data->write service EEPROM data to cluster->Put instrument in car->select correct login type->Load original EEPROM file->activate car OBDII communication->write EEPROM via OBDII->read immo data->save immo data->make dealer key->add key->reset instrument. Detail can be find in Special note for lost all key
(PICTURE 5.3)
u Read KM/Write KM:Change KM for car, after write new km you need reset instrument to apply it
u ABS Coding:ABS coding will not lost in add key with working key. But for lost all key, the ABS coding usually lost, so you need backup ABS coding first. If cannot back with button “Backup”, you can write down coding with enter 03 ABS diagnostic.
Backup: Read ABS coding and backup automatically Restore: Restore the backup ABS coding for target car Set to EEPROM: Read ABS coding from car, and set this coding to ABS EEPROM dump which is read by BDM programmer
u VIN: Vehicle identification number, usually 17 characters
u Immo No: Vehicle immobilizer identification number, usually have 14 characters. For 4th immobilizer cluster, this value usually have 14 bytes blank
u CS: Component security bytes. It has 12 bytes for UDS 4th immobilizer cluster. Move your mouse to this area, you will get balloon show 7 bytes CS in ECU ((PICTURE 5.4) show original 6 byes CS is: C2 D3 45 7E 68 0E). You can’t find 7th byte CS from UDS 4th immobilizer cluster, it don’t have 7th byte, it have another 6 bytes CS part 2
CAN 4th immobilizer cluster (CDC32xx, A3/TT/R8) will have 7 bytes at this value. That is the original 7 bytes CS ECU must have same 6 bytes CS with balloon show CS bytes. If they are not same, you car can’t start
(PICTURE 5.4)
u PIN: login code, it can use login to ECU or other module which support login immobilizer PIN. You can learn dealer key with CAN protocol cluster
ECU has same PIN with this value. If not same, car will not start. So, for CAN protocol cluster, you can learn key with PIN read from ECU
u MAC: Synchronization codes between ECU and immobilizer system, usually have 4 bytes. The first 2 bytes is immobilizer synchronization code, the last 2 bytes is ECU synchronization code. MAC value in (PICTURE 5.4) is “B188708F”, “B188” is immobilizer synchronization code, “798F” is ECU synchronization code. Generally, the synchronization code for ECU or immobilizer system is a fixed value. If you install new ECU, MAC value in immobilizer will change last 2 bytes to new ECU synchronization code; if you install new immobilizer, MAC value in ECU will change first 2 bytes to new immobilizer synchronization code. Normally, MAC value must be same between ECU and immobilizer. If there are not same, ECU and immobilizer system will have same DTC error like this: Engine control unit is not authorized. You can fix this error by “Adapt Unit->select ECU->Read->Write”, it will
synchronize MAC automatically between ECU and immobilizer system
u Status: There will be different value accord each login type. Usually it have a power class byte, you can find the power class byte in status. In (PICTURE 5.4), power class 80 is the 3rd byte in status. If you want change this value in cluster, just write new byte in status and write immo data. ECU also has same power class value. Power class is a fixed value for same ECU with same software version. Change power class in ECU is difficult, one method is change power class in ECU FLASH file(this method is difficult, almost all the ECU have different FLASH file), another method is ECU – Flasher(Diagnostics->ECU Flasher), so you must have a know power class flash file. If ECU and immobilizer system have different also will get DTC error like this: Engine control unit is not authorized. You can fix this by search ECU power class and write it to immobilizer system.
u Config: This value contain car manufacture, key number, immobilizer status (new, learned, closed), keyless or not etc. Please don’t change this value if you are not sure
u Type: This value is car manufacture, it shown type accord data in Config area. For NEC24C64 login type, the 5th byte in config area is car manufacture: 01 VW, 06 Skoda, 03 Audi, 05 Seat. (In (PICTURE 5.4), the 5th byte is 01, means this cluster is config to VW)
u Key 1 – Key 8: VAG cars can have at most 8 keys in one immobilizer. If key ID show FFFFFFFF means there’s no key. Another way to get Key ID is enter “diagnostic->25 immobilizer system->advance measure value-> select transponder id item”.((PICTURE 5.5) is get ID window for UDS 4th immobilizer cluster, other immobilizer system can find in measured values. That means you can get KEY ID via diagnostic function even lost all key)
(PICTURE 5.5)
Attention: For 4th immobilizer cluster
u Some instrument will become dark after login, this is normal because instrument is enter service mode. You can active it by reset instrument after finish all operation, Pay attention to the login success window (PICTURE 5.6)
u If you get message like “cannot connect to car”, make sure switch ON ignition, OBD line connect to car, lost all key need active OBD connection by open dangerous light, press on the brakes for several times
u After change KM, if the cluster still show old value, just need reset instrument
u Make key steps for 4th immobilizer cluster:
1) Diag to detect login type for cluster, if can’t auto detect login type, just choose logint type manually
2) Read EEPROM and Save (IMPORTANT!!!)
3) Read Immo Data and Save (IMPORTANT!!!)
4) Make Dealer Key. There are 2 type, normal dealer key and OEM dealer key. OEM dealer key: The OEM dealer key support enter workshop for online adaptation (ODIS, VAS5054). Make OEM dealer key need special MEGAMOS 48 transponder that support change ID (PICTURE 5.7). OEM dealer key must select one original key position. If you don’t know which one is lost, you can insert having working key and run “Check working key position”, the having working key will become gray once detected. The not grayed position is the lost key. You can select one to make OEM key. After OEM key make success, it can start engine directly, don’t need step 5)
5) Add Key (PICTURE 5.8). Support 3 methods:
a. Add dealer key to immobilizer directly: Input dealer key to SVDI2 programmer before continue. Keyless key don’t use this method, require learn
b. Learn key with read CS bytes: Input learn key number, read immo data via OBD, learn key with the read immo data
c. Learn key with immo data: Input learn key number, load immo data, learn key with immo data support
(PICTURE 5.6)
(PICTURE 5.7)
(PICTURE 5.8)
Special note for lost all key:
u Lost all key is same with add key type: NEC+95320, Motorola 9S12XHZ512(Golf6 MM7 – 2011), NEC+95320(Johnson Controls), NEC+95320(JCI – 2013 Bora/Jetta), Visteon, Audi A4 – Crypto RB4, Audi A4 – Crypto RB8 etc. Lost all key is same with add key with working key, no extra operation. Other login type have special procedure
u OBD lost all key: All 4th immobilizer system can make a dealer key via OBDII directly. Don’t need BDM read cluster EEPROM, only require know PIN and 6 bytes CS. PIN and CS can read from Engine Control Unit function via OBDII. Detail can be found in Key Learn->Key Learn->OBD Lost All Key method
u Service mode lost all key:
Some login type cannot read immo data while lost all working key. Login type include (CDCxx+24C32, A3/TT/R8 (CDC32xx), NEC24C32, NEC24C64, NEC24C64(2012 TFT color display), NEC24C64(2013-), NEC24C64(2013 TFT color display), Audi A1, Audi Q3). This type can make dealer key with following steps: (PICTURE 5.3):
1) Activate OBD communication by open dangerous light, press on the brakes for several times. Backup ABS coding, you can run backup function on bottom right corner, or enter diagnostics 03 ABS, backup abs coding
2) Find EEPROM chip from instrument, usually use 24C32 or 24C64 chip, read EEPROM dump with BDM programmer and save as original EEPROM dump
3) Enter “Service Mode”, load original EEPROM dump and prepare service EEPROM dump. Attention: DON’T overwrite the original EEPROM dump
4) Write service EEPROM dump to EEPROM chip (24C32 or 24C64)
5) Restore dashboard to car
6) Back to main window and select right login type
7) Load original EEPROM dump (IMPORTANT!!!)
8) Activate OBD communication by open dangerous light, press on the brakes for several times
9) Press “Write EEPROM” write original dump to dashboard via OBDII (IMPORTANT!!!)
10) After write success, read immo data and save (IMPORTANT!!!)
11) Make a new dealer key and add to immobilizer system
12) If car use keyless key, learn the dealer key with learn method (with immo data support)
13) Start engine with new dealer key, complete
5.1.2. 4th immobilizer system – Passat /CC
Passat/CC has 2 transponder types: one is MEGAMOS 48, another one is HITAG2 (46 Transponder). Before make key you must select transponder type 48 or 46. This type support OBD lost all key, Detail can be found in Key Learn->Key Learn->OBD Lost All Key method. How to find correct transponder type while lost all key? You can find answer for Transponder type OK in “Key Learn ->Key Learn” Here we list several method for add new key (operation steps use number in picture):
1) You can read PIN and 6 bytes CS from ECU via OBD, no comfort module dump
46 Transponder: Lost all key is same as add key with working key. Place 7th byte CS to “FF”, you can follow steps: 1->3->4 (PICTURE 5.9) 48 Transponder: Add key: you need find 7th byte CS from working key, you can follow steps: 1->2->3->4 (PICTURE 5.9) Lost all key: this type need use try start method to find working key. Try times belong to 0-255. First try need start from 0, if failed in the procedure, record the failed times. Next time, try start with last failed times. You can follow steps: 1-2-3(PICTURE 5.10)
(PICTURE 5.9)
(PICTURE 5.10)
2) Cannot read 6 bytes CS from ECU. Here you need comfort module dump (95320) support. After load comfort module dump you will get window (PICTURE 5.11)
It has 3 methods to decrypt comfort module dump:
u Decrypt 7 bytes CS from dump file (usually we select this method)
u Get CS from ECU EEPROM dump
u Have 6 bytes CS
(PICTURE 5.11)
Ø Decrypt success (PICTURE 5.12): You will get the 7 bytes CS and PIN after decrypt success. So make dealer key is very easy. No matter 48 or 46, no matter lost all key or add key, they are all same. You can follow steps: 1->2->3(PICTURE 5.13)
(PICTURE 5.12)
(PICTURE 5.13)
Ø Decrypt failure:This type rarely happen
Add Key:You can follow steps: 1->2->3->5(PICTURE 5.14) Lost All key: this type need use try start method to find working key. Try times belong to 0-255. First try need start from 0, if failed in the procedure, record the failed times. Next time, try start with last failed times. You can follow steps: 1->4->5 (PICTURE 5.14). Number 6 (Unlock 46 key) in (PICTURE 5.14) only unlock the temp key under try start method under decrypt failure method
(PICTURE 5.14)
5.1.3. 4th immobilizer system – Touareg/Phaeton/A8/Cayenne/Bentley
This type use HITAG2 (46 Transponder). Operation steps following: (operation steps use number in picture)
u Known 7 bytes CS, input 7 bytes CS and PIN, you can follow steps: 3->5 (PICTURE 5.15)
u Have 6 byes CS and PIN: you can read 6 bytes CS and PIN from ECU via OBD. If OBD read failed, you need read ECU EEPROM dump (95160 or 95128) with BDM programmer, Load ECU EEPROM get 6 bytes CS and PIN
Add Key:You can follow steps: 1->2->5 (PICTURE 5.15) Lost All Key: You can follow steps: 1->4->5 (PICTURE 5.15). this type need use try start method to find working key. Try times belong to 0-255. First try need start from 0, if failed in the procedure, record the failed times. Next time, try start with last failed times. You can follow steps: 1->4->5 (PICTURE 5.15). Number 6 (Unlock Touareg key) in (PICTURE 5.15) only unlock the temp key under try start method
u Some earlier cars (-2009) can get 7 bytes CS and PIN from Kessy 93C86 EEPROM (see chapter 6.6 EEPROM Dump Tool)
u Sometimes the engine cannot start after learn key. Switch ON ignition with learned key, wait a few minutes then can start. (See detail for Engine start permitted in “Key Learn ->Key Learn”)
(PICTURE 5.15)
5.1.4. 4th immobilizer system – Audi A6/Q7/Allroad
This type use MEGAMOS 8E transponder. This type support OBD lost all key, Detail can be found in Key Learn->Key Learn->OBD Lost All Key method
(PICTURE 5.16)
Method to prepare new dealer key: If you want prepare a new dealer key, you must know the total 12 bytes CS. But there’s only 6 bytes CS in ECU, so we need read the whole J518 EEPROM dump
1) Autodetect from engine(ECU) ((PICTURE 5.16) Number 1): Read CS from ECU, only read 6 bytes CS and PIN, With 6 bytes CS and PIN help, you can use standard method to read/write EZS-Kessy EEPROM(J518), Read/Write VIN etc. You can follow steps: 1->7->2->4->6 (PICTURE 5.16)
Attention: OBD stand method only support 9S12DT128 type. In (PICTURE 5.16), number 7, 8, 9, 10 only support J518 use 9S12DT128 chip (Most cars before 2009 use this type). J518 with 9S12DT(G)256 chip (Most cars after 2009 use this type) don’t support these 4 items. That means 9S12DT(G)256 type doesn’t support prepare a dealer key with this method. Fortunately, we can prepare a dealer key by OBD Lost All Key
2) Load J518 EEPROM dump file ((PICTURE 5.16) Number 2): Once you get EEPROM dump, you can load it here to make a new dealer key. You can follow steps: 2->4->6 (PICTURE 5.16)
3) Read J518 EEPROM dump with working key ((PICTURE 5.16) Number 3): If you have working key, allow read J518 EEPROM dump with service mode. Note: The cluster may become dark under this operation. If cluster still dark after operation finished, please disconnect car battery and connect again
Select which type to enter service mode: Most cars before 2009 use 9S12DT128 type, most cars after 2009 use 9S12DT(G)256 type. But there’s some car in 2009, you need try yourself. After read J518 EEPROM dump, you can follow steps: 2->4->6 (PICTURE 5.16) A few car with 9S12DT(G)256 can’t read with 9S12DT(G)256 type, only support read through 9S12DT128 type. Here the J518 EEPROM dump is not the whole dump file (Pay attention to programs’ message). Attention: DON’T write this false dump to J518. This false dump don’t support make OEM key. It can only use for prepare normal dealer key and learn key
4) Make Dealer Key ((PICTURE 5.16) Number 4): Run this operation will try read J518 EEPROM with standard OBD method first. If read success, make dealer key with read data. If failed, it will prepare dealer key with loaded J518 EEPROM dump file. So, just continue when you get something like “Cannot connect to Kessy!”
5) Make OEM key remote ((PICTURE 5.16) Number 5):
This operation need special OEM remote key First you need make a start key for 8E transponder which is in OEM remote key, make sure this 8E transponder can start engine, then read J1518 EEPROM dump once more (PICTURE 5.17). Load the newest J518 EEPROM and place your OEM remote key to SVDI2 programmer accord (PICTURE 5.18), after operation complete, remote is work now
(PICTURE 5.17)
(PICTURE 5.18)
5.2. 5th immobilizer system
This type use VAG immo5 transponder or OEM key Support following cars: A4 (2009-), A5, Q5, A6 (2012-), A7, A8(2011-), Touareg (2011-)
(PICTURE 5.19)
Method to prepare new dealer key: If you want prepare a new dealer key, you must know the total 16 bytes CS. So we need read BCM2 data from BCM2 module (J393)
1) Choose method to read BCM2: Until now most cars support read BCM2 data via OBDII (Add key and lost all key all support). ((PICTURE 5.19) Number 1), read BCM2 need enter service mode, the cluster may become dark under reading.
u Note: Once you get error like “read data length error” in OBD read method, you need read BCM2 data with 5th BDM Programmer ((PICTURE 5.19) Number 2)
u Note: OBD Read BCM2 for lost all key need disconnect BCM2 power (2 interfaces) for a few seconds. Just follow program message
u Note: Under OBD Read BCM2 for lost all key process, if cannot read BCM2 data after disconnect power or you get disconnect power for next time read, this type may not support OBD read without working key, you need read BCM2 data with 5th BDM Programmer
u Note: Before you read BCM2 via OBDII, you’d better switch OFF/ON ignition again, Keyless cars press START/STOP button again to switch ON. Else may enter lost all key mode, of course, if read success, it is also right BCM2 data
u Note: BCM2 data is always for the same car. So you only need read one time. As long as you have the BCM2 data, you don’t need to read again, no matter key learn, no matter when
Some pictures for 5th BDM Programmer read method:
Ø (PICTURE 5.20) is BCM2 (J393) module position
Ø (PICTURE 5.21) is BCM2 (J393) module remove plug
Ø (PICTURE 5.22) is introduction for 5th BDM Programmer
Ø (PICTURE 5.23) is BCM2 (J393) front connect line
Ø (PICTURE 5.24) is BCM2 (J393) back connect line
(PICTURE 5.20)
(PICTURE 5.21)
(PICTURE 5.22)
(PICTURE 5.23) (PICTURE 5.24)
2) Check Key Status ((PICTURE 5.19) Number 3): Check key is locked or not, is keyless key or not. For there are many OEM keys on the market, keyless key result may not accurate
3) Make Dealer Key ((PICTURE 5.19) Number 4): Load BCM2 data and wait complete
u Note: After make key successfully. The key is not locked before you learn it. So you can make key for other car before learn. Once learn the key, it locked
u You need select car type under make dealer key process. Is vehicle belongs to A4/Q5/A5 or A6/A7/A8/Touareg. Make key for A4/Q5/A5 don’t need working key support. Make key for A6/A7/A8/Touareg need working key support, if you don’t have working key, the keyless function will not work
u For OEM keys: You can unlock the locked OEM key in “Transponder Programmer->Other Key Tool”. (Most OEM keys is not support unlock, it can be prepared again with lock status, then learn it as normal). If the OEM keys support change ID, you can make an OEM key, make method is same as 4th immobilizer cluster OEM key, select one original key position and continue
4) Key Learning ((PICTURE 5.19) Number 5): Load BCM2 data and follow programs’ message. At the last, you will get a message insert every key to learn, don’t press “OK” until you get message “Learn key success” at the bottom. If you press “OK” before that message will cause key learn failure. When you get that message, the cluster will show “x-y”, “x” is the learned key number and “y” is the total learning number. If you learn 2 keys, first will show 0-2, after learn 1 key, it show 1-2, after learn 2 keys, it show 2-2. After success learn key, it will show KM
5) Alarm ON: Open immobilizer alarm, we suggest you open it after key learn
6) Alarm OFF: Close immobilizer alarm
5.3. Key Learn
Support learn key for most of the cars via OBDII. Some need only PIN, and some need 6 bytes CS support. 5th transponder enter 5th immobilizer system for key learn Support following types:
1) Audi A4/A6 (immobilizer box) -1997 - KWP1281
2) Audi A8 (immobilizer box) -1999 - KWP1281
3) Audi A2/A3/A6/TT/Allroad 1997+ - KWP1281
4) Audi A4 1997-2002 - KWP1281
5) Audi A4 2002+ - KWP2000
6) Audi A8 1999-2002 - KWP1281
7) Audi A3 - CAN
8) Audi A6/Q7/Allroard 2005+ - CAN (Support OBD lost all key)
9) Seat Altea -2007 - CAN
10) Seat Cordoba
11) Seat Ibiza (immobilizer box) -1999 - KWP1281
12) Seat Ibiza 1999+
13) Seat Leon - KWP1281
14) Seat Leon -2007 - CAN
15) Seat Toledo - KWP1281
16) Seat Toledo -2007 - CAN
17) Skoda Octavia - KWP1281
18) Skoda Octavia II -2007 - CAN
19) Skoda Octavia II 2007+ - CAN
20) Skoda Superb - KWP1281
21) Skoda Roomster - KWP1281
22) Skoda Scout -2007 - CAN
23) Skoda Fabia (immobilizer box) -1999 - KWP1281
24) Skoda Fabia 1999+ - KWP1281
25) VAG (immobilizer box) - KWP1281
26) VAG KWP1281 Immobilizer - KWP1281
27) VAG KWP2000 Immobilizer - KWP2000
28) VW Polo (PCF7935 transponder) - KWP1281
29) VW Touareg/Phaeton/Bentley/Cyenne KLine - KWP2000
30) Audi A8 - CAN
31) VW,Seat, Skoda -2007 - CAN
32) Porsche Cayenne CAN - CAN
33) VW Passat B6/CC – CAN (Support OBD lost all key)
34) VW Passat B6/CC with EDC17/MED17 – CAN (Support OBD lost all key)
35) VW Golf V with Visteon dash
36) Audi A4 (RB8 Instrument Cluster) 2004+ - KWP2000
37) VW, Seat, Skoda 2007+ - CAN (Support OBD lost all key)
38) VW, Seat, Skoda, Audi with VDO NEC 2009+ - UDS (Support OBD lost all key)
39) Lamborghini Gallardo -2005
40) Lamborghini Gallardo 2005+
41) VW with NEC+95320 or Magneti Marelli with Motorola 9S12 2009+ - UDS (Support OBD lost all key)
42) Immobilizer box use Megamos - KWP1281
43) New Beetle - KWP2000
44) Johnson Controls with 95320 - UDS (Support OBD lost all key)
45) VW Dashboard with VDO NEC35xx 2013+ - UDS (Support OBD lost all key)
46)
(PICTURE 5.25)
Key Learn window (PICTURE 5.25), after you enter this window, SVDI2 – VAG will auto detect vehicle type. If you find the detected vehicle is error, please select correct Vehicle manually before learn key
u Immo status value: “YES” mean this item is correct, “NO” mean this item is not correct, “N/A” mean the immobilizer system not support this detect or car immobilizer is incorrectly configured
Ø Engine start permitted: “YES” mean can start engine, “NO” mean cannot start
Ø ECU responding: “YES” mean immobilizer can communicate with ECU, “NO” mean can’t
Ø Transponder type OK: “YES” mean transponder type correct, “NO” mean incorrect
Ø Dealer Key: “YES” mean ignition key is dealer key, “NO” mean not dealer key
Ø Locked key: “YES” mean ignition key is locked, “NO” mean not locked
Ø Learned key: “YES” mean ignition key is already learned, “NO” mean not learned
Ø Key count: The value is total key number in immobilizer system
Ø Lock time-Accept login (PIN): 0 mean accept PIN, key learn can be performed, other value mean not accept PIN, key learn can’t be performed. If the value is X (Decimal value, not zero), mean the immobilizer system will accept PIN after X minutes. The value will minus 1 automatically after every minute, wait change to 0 and start key learn. Usually the maximum value of X is 10. If you get value bigger than 10, mean immobilizer is incorrectly configured and key learn can’t be performed
Ø Lock time-Accept transponder: 0 mean accept transponder, key learn can be performed, other value mean not accept transponder, key learn can’t be performed. If the value is X (Decimal value, not zero), mean the immobilizer system will accept transponder after X minutes. The value will minus 1 automatically after every minute, wait change to 0 and start key learn. Usually the maximum value of X is 10. If you get value bigger than 10, mean immobilizer is incorrectly configured and key learn can’t be performed. When you get a none 0 value here, the Dealer key, Locked key, Learned key usually show “N/A”, mean not support at this time
u For UDS 4th immobilizer cluster, don’t support engine start permitted, ECU responding, transponder type OK, lock time-accept login, lock time-accept transponder is not support. These items always show “N/A”
u For CAN protocol and K-Line protocol immobilizer system, all the value should be display correct value after you insert a working key to ignition switch
u Some simple determination though immo status:
Ø Learn key failed: Insert the key to ignition switch, verify “Dealer Key”. If you get “NO” mean ignition key is not dealer key. You need prepare dealer key first
Ø Check ignition coil status:
For UDS 4th immobilizer cluster, insert a locked MEGAMOS 48 to ignition switch, verify “Locked Key”. If you get “YES” mean ignition coil can detect the transponder, while “NO” mean ignition coil have problems, another possibility is that the immobilizer system cannot detect transponder signals. For CAN protocol and K-Line protocol immobilizer system, insert a correct transponder to ignition switch, verify “Transponder type OK”. If you get “YES” mean ignition coil can detect the transponder, while “NO” mean ignition coil have problems. If get “N/A” mean wait lock time-accept transponder turn 0
Ø Passat/CC 46 Transponder learned key failure, verify “Dealer Key”. If you get “NO” mean ignition key is not dealer key. You need prepare dealer key first. Don’t worry about “Locked Key” value, dealer key can be learned without test this item. Please check other failure reason
Ø Passat/CC lost all key, don’t know transponder type, Prepare a 48 transponder and a 46 transponder, insert to ignition switch one by one, verify “Transponder type OK”. If you get “YES” mean the immobilizer system use this type transponder
Ø Touareg/Phaeton/A8/Cayenne/Bentley (4th immobilizer): Car cannot start after learn key. Verify “Dealer key”, “Locked key”, “Learned key” status, if they all show “YES”, verify “Engine start permitted”. If you get “NO” here, please leave ignition
switch ON for several minutes and try start again
u Learn (PICTURE 5.25):
Ø Before you learn key, you must prepare all dealer keys. The key will not start if it is not learned
Ø There will be simple procedure for make key and learn key after you select a vehicle. Please read it before learn key
Ø Most cars only need PIN while learn key, you just need follow programs’ message
Ø For vehicles can learn key only with PIN, you can learn the key with adaption function in diagnostic 25 immobilizer system. This need login with PIN first. (Usually use channel 1 or 21)
Ø For CAN protocol immobilizer system, if the immobilizer have 0 key before enter key learn, usually need wait 5 minutes after success login
Ø CAN immobilizer cluster support learn one key without delete original key
Ø The following 5 types need PIN and 6 bytes CS to learn key. Input learn key number press button Learn, get window (PICTURE 5.26). You can execute “Autodetect PIN/CS” before key learn; type in known PIN and CS to continue; load immo data (A6/Q7 load J518 EEPROM) to get PIN and CS:
1) Audi A6/Q7/Allroard 2005+ - CAN
2) VW, Seat, Skoda, Audi with VDO NEC 2009+ - UDS
3) VW with NEC+95320 or Magneti Marelli with Motorola 9S12 2009+ - UDS
4) Johnson Controls with 95320 - UDS
5) VW Dashboard with VDO NEC35xx 2013+ - UDS
In addition, these 5 types support load immo data (A6/Q7 load J518 EEPROM) prepare dealer key (PICTURE 5.25)
(PICTURE 5.26)
u Autodetect PIN/CS (PICTURE 5.25):Read PIN and CS from engine control unit or immobilizer system automatically. After success read PIN and CS, you just need input key count to learn key
u OBD Lost All Key method
Following vehicles support OBD lost all key:
1) Audi A6/Q7/Allroard 2005+ - CAN
2) VW Passat B6/CC – CAN
3) VW Passat B6/CC with EDC17/MED17 – CAN
4) VW, Seat, Skoda 2007+ - CAN
5) VW, Seat, Skoda, Audi with VDO NEC 2009+ - UDS
6) VW with NEC+95320 or Magneti Marelli with Motorola 9S12 2009+ - UDS
7) Johnson Controls with 95320 - UDS
8) W Dashboard with VDO NEC35xx 2013+ - UDS
Item 1) with OBD lost all key will get window (PICTURE 5.27) Item 2) 3) with OBD lost all key will get window (PICTURE 5.28) Item 4) with OBD lost all key will get window (PICTURE 5.29) Item 5) 6) 7) 8) with OBD lost all key will get window (PICTURE 5.30). Note:We don’t recommend use OBD lost all key method for item 6) and item 7). These 2 types can read immo data from cluster even lost all key
Ø The common point for OBD lost all key is it will change one or several component security bytes in immobilizer system. So, all the original key will stop work after perform this function, and will not support key ordered from car dealer
Ø If you want accept the key ordered from car dealer again, you need enter dealer workshop to do online change immobilizer system operation, don’t need new module for immobilizer, it can performed with the original immobilizer system. After finish the above operation, the ordered key can learn successfully. But all the key configured with lost all key method will stop working
Ø Expect item 1), all other lost all key type support make OEM key, you can enter dealer workshop do online operation with OEM key. Attention: DON’T do online change immobilizer system operation, if you do this operation in dealer workshop, all the key made by lost all key method will stop working
(PICTURE 5.27)
(PICTURE 5.28)
(PICTURE 5.29) (PICTURE 5.30)
5.4. Remote Key Adaptation
This function can adapt remote control for 09 “Central Electric” (BCM system and BFM system) (UDS 4th immobilizer cluster)
u BCM Remote Key Adaptation (PICTURE 5.31)
Ø Clear all remote data: After function performed, all the remote key lost its remote function
Ø Learn remote control: Input remote key numbers, press “Start”, follow the programs’ message to complete adapt remote key
Ø You can enter diagnostics 09 “Central Electric”, select adaptation function, manually complete remote control operation
(PICTURE 5.31)
u BFM Remote Key Adaptation (PICTURE 5.32)
Ø Learn remote control: Input remote key numbers, press “Start”, follow the programs’ message to complete adapt remote key. BFM system support at most 5 remote keys
(PICTURE 5.32)
6. Special Function
6.1. Engine control unit
OBD read PIN, CS, MAC, change KM, immo OFF/immo ON, read FLASH. Most engine control unit support auto detected login type. You need select ECU type for error detected ECU manually Support following types (Some car has 2 ECUs, one is master, one is slaver):
1) ME7.1.1/7.5/7.8 master
2) ME7.1.1/7.5/7.8 slaver
3) MED17
4) MED 9.1 single
5) MED 9.1 master
6) MED 9.1 slaver
7) MED 9.5.10
8) EDC15x
9) EDC16U1
10) EDC16U1 master
11) EDC16U1 slaver
12) EDC16U31
13) EDC16U31 master
14) EDC16U31 slaver
15) EDC16U34
16) EDC16CP/EDC16CP34
17) EDC16CP34 master
18) EDC16CP34 slaver
19) EDC16C4 master
20) EDC16C4 slaver
21) EDC17
22) SIMOS PPD 1.1/1.5(Siemens)
23) SIMOS benzin(Siemens
24) Porsche 5.2/7.8
(PICTURE 6.1)
u Read memory data ((PICTURE 6.1) Number 1): OBD read memory data (EEPROM), decrypt it and show PIN/CS/MAC. The PIN read from ECU can use for key learn, change 2nd hand module etc
u Write memory data ((PICTURE 6.1) Number 2): Write EEPROM dump to ECU via OBD, support EDC15x, ME7.1.1/7.5/7.8 master, ME7.1.1/7.5/7.8 slaver, Porsche 5.2/7.8 etc
u Save File…/Load File…: Save the read data/Load file to buffer
u Write KM ((PICTURE 6.1) Number 3): Set new KM in ECU via OBD, support EDC15x and all type of EDC16x
u IMMO OFF ((PICTURE 6.1) Number 4): Switch OFF immo verify via OBDII. Note: If you set immo OFF, car can start without verify ECU immo status. You can flash ECU with “Diagnostics -> ECU Flasher” after close immo. Support EDC15x, ME7.1.1/7.5/7.8 master, ME7.1.1/7.5/7.8 slaver, all type of EDC16x
u IMMO ON ((PICTURE 6.1) Number 5): Switch ON immo verify via OBDII. Note: If you set immo ON, when you try start car, it will verify ECU immo status first. Support EDC15x, ME7.1.1/7.5/7.8 master, ME7.1.1/7.5/7.8 slaver, all type of EDC16x
u Flash counter-Read ((PICTURE 6.1) Number 6): Read flash counter via OBD, include attempt flash number, success flash number, flash tool
u Flash counter-Write ((PICTURE 6.1) Number 7): Write flash counter to ECU, include attempt flash number, success flash number, flash tool
u Write FLASH ((PICTURE 6.1) Number 8): Write the load BIN file to ECU. Attention: You must backup original FLASH+EEPROM before perform this function. Write error flash data will cause ECU damage. Support EDC15x, all type of EDC16x, MED9.X
u Read FLASH ((PICTURE 6.1) Number 9): Read ECU FLASH via OBDII
u Calculate OBD data online ((PICTURE 6.2) Number 2): Use for MED17/EDC17 type ECU, sometimes there’s no internet when you read memory data, so it will failed. But you can save the read memory data, and run this function after you connect to internet, steps: 1->2(PICTURE 6.2)
u Calculate EEPROM/FALSH for PIN/MAC/CS ((PICTURE 6.2) Number 3): Use for MED17/EDC17 type ECU. Some MED17/EDC17 (example: UDS protocol) don’t support to read memory data, you can read MED17/EDC17 FLASH+EEPROM with other BDM programmer. Decrypt PIN and CS by perform this function
(PICTURE 6.2)
u Attention: The following function need internet support and require authorize for CONDOR Automatic Key Cutting Machine: OBD read MED17/EDC17 PIN/CS/MAC, Calculate OBD data online, Calculate EEPROM/FLASH for PIN/MAC/CS
6.2. K-Line Instrument/Immobox
OBD read PIN from K-Line instrument and immobox, read/write EEPROM, change KM etc Support following types:
1) Instrument Cluster(VDO66,VDO86, Motometer)
2) VW LT immobilizer box
3) VW Gol immobilizer box
4) White immobilizer box - Audi A4/A6/A8
5) Black immobilizer box Siemens 6 PINs HC05 (Immo1)
6) Black immobilizer box Siemens 6 PINs HC05 - 2400 (Immo1)
7) Black immobilizer box Siemens 6 PINs TMS (Immo1)
8) Instrument Cluster - Audi A4 B5 with Board Computer (-1997)
9) Instrument Cluster - Audi A4 B5 without Board Computer (-1997)
10) Instrument Cluster - Audi A8 (-10.1996)
11) Instrument Cluster - Audi A8 (11.1996-)
12) Instrument Cluster - Audi A6 B45 (-1997)
13) Instrument Cluster - Magneti Mareli - Shadow 1
14) Instrument Cluster - Magneti Mareli - Shadow 2 (Passat)
15) Instrument Cluster - Magneti Mareli - Shadow 3 (TT)
16) Instrument Cluster - Magneti Mareli - Direct 1996-2000
17) Instrument Cluster - Magneti Mareli - Direct 2000-
18) Instrument Cluster - Sharan/Galaxy (-2000)
19) Instrument Cluster - Audi A4 BOSCH RB4 Crypto 2001+
20) Instrument Cluster - VW Golf 4 BOSCH RBx
21) Instrument Cluster - Audi A4 BOSCH RBx
22) VW Phaeton/Touareg, Bentley Continental, Porsche Cayenne
23) Instrument Cluster - Audi A4 BOSCH RB8 Crypto 2004+
24) Instrument Cluster - Lamborghini Gallardo -2005
25) Instrument Cluster - Lamborghini Gallardo 2005+
(PICTURE 6.3)
u Read EEPROM ((PICTURE 6.3) Number 1): Read EEPROM for instrument or immobox via OBDII, show PIN value. The PIN value can use in key learn and change 2nd hand module etc
u Write EEPROM ((PICTURE 6.3) Number 2): Write EEPROM to instrument or immobox via OBDII. Note: you’d better backup original EEPROM before write new data
u Save File…/Load File…: Save the read data/Load file to buffer
u Read FLASH ((PICTURE 6.3) Number 3): Read instrument FLASH via OBDII
u Reset ECU ((PICTURE 6.3) Number 4): Reset instrument or immobox via OBDII
u Virgin (Factory new) ((PICTURE 6.3) Number 5): Set cluster to virgin status. Virgin device can perform learn 2nd hand module via OBDII
u Write KM ((PICTURE 6.3) Number 6): Set new KM in K-Line instrument
u Ignore negative response ((PICTURE 6.3) Number 7): Some instrument and immobox can’t read all the EEPROM area. If you don’t select this option, the read/write operation will return once it meet protected area. If you select this option, it will continue operation with follow address. If you select this option, and you find there are sequence 55 55 55 55 … in EEPROM data, means that position don’t support read
u Reset component security ((PICTURE 6.4) Number 1): If you select A4 Crypto RB4 or A4 Crypto RB8 type, you can see this function. It support set new component security bytes, PIN, MAC value to cluster
u Repair RB4 NOT start ((PICTURE 6.4) Number 2): If you select A4 Crypto RB4 or A4 Crypto RB8 type, you can see this function. You can fix car stop working suddenly by perform this operation. Of course, before run this function, you’d better backup
EEPROM dump via OBDII
u Write new immo status ((PICTURE 6.4) Number 3): You can see this function by select A4 Crypto RB8 type. The working immo status is “6”. You can write to fix car stop working suddenly
(PICTURE 6.4)
6.3. Change KM
Support following types (4th immobilizer cluster enter 4th immobilizer system for change KM, K-Line cluster enter K-Line instrument/immobox for change KM):
1) CAN Instrument - A4(2009-)/A5/Q5
2) CAN Instrument - A6/Q7/Allroad (-2011)
3) CAN Instrument - A8 (2003-2011)
4) CAN Instrument – Touareg/Phaeton (2007-2010)
5) CAN Instrument – VW Touareg(2010-)/Audi A6 (2012-),A7,A8(2011-)
6) CAN Instrument– VW Lavida(China)1.6, 2.0 (NEC+24C08)
7) K-Line Instrument– Touareg/Phaeton (-2007)
(PICTURE 6.5)
u The steps for change KM (expect item 5) (PICTURE 6.5):
1) Read old KM with button “Read KM”
2) Type in new KM value
3) Run “Write KM”
4) For A4/Q5, A6/Q7/Allroad(-2011) types cluster. It need an unsure time from several minutes to 2 hours for first time change KM. Because SVDI2-VAG need to unlock cluster memory by searching. Every cluster has different lock value, so the time is not fixed. After you unlock the memory, it will be very quickly for second time change KM
u VW Touareg (2010-)/Audi A6 (2012-),A7,A8(2011-) method (PICTURE 6.6):
1) Connect SVDI2 to car with OBD line, use "Read Dashboard config file" read and save config file A
2) Use BDM programmer read the 95320 EEPROM dump in dashboard, save as file B
3) Press button "Decrypt KM from EEPROM", it will first load config file A, then load 95320 EEPROM file B
4) After decrypt success, KM value will show in Old KM
5) Input new KM, press button "Prepare EEPROM with new KM" and save new 95320 EEPROM file C
6) Write new 95320 EEPROM file C to 95320 chip, and put the dashboard to car
7) Complete
(PICTURE 6.6)
6.4. Adapt Unit
You can install 2nd hand module with this function, also can synchronize ECU with immobilizer system etc Support following types:
1) ECU (EDC16/EDC17/MED9/MED17/Simos) – 4th immobilizer ECU
2) Kessy Audi A8, VW Touareg/Phaeton
3) Passat B6 /CC Comfort module
4) A6/Q7/Allroad Transmission gearbox
5) Electrical Steering Colum Lock(PQ35)
6) A6/Q7/Allroad EZS-Kessy
(PICTURE 6.6), it looks very easy for change 2nd hand module, write after read is completed. But there’s many important point in the process. Follow will list in detail for each item, please read carefully before you use this function:
l How to get PIN/CS value stored in 2nd hand module
Ø Usually you can get original PIN/CS from car ECU where the 2nd hand module was original equipped. Of course, you can get original PIN/CS from immobilizer system where the 2nd hand module was original equipped, example: 4th immobilizer cluster, J518, Kessy etc
Ø For new car, you can get power class from the front system
l Sometimes ask to input power class for 2nd hand module
Ø You need type in power class (stored in 2nd hand module) for some type
Ø When you select load 2nd hand EEPROM dump will get window like (PICTURE 6.8), if you get nothing or “00” here, means the decrypt power class is error, you need type correct power class. If show with other value (such as 63, 26, 07, 80, FE, 84) automatically, mean the power class was decrypted form EEPROM dump correctly. Note: If you get power class “00” for new module, it may correct value.
Ø When you select known PIN/CS, some type get window to input power class (PICTURE 6.8). You can get original power class from car ECU where the 2nd hand module was original equipped. Of course, you can get original power class from immobilizer system where the 2nd hand module was original equipped, example: 4th immobilizer cluster, J518, Kessy etc
Ø For new car, you can get power class from the front system
l About adapt Gearbox and J518 for A6/Q7/Allroad
Ø CS is the original component security bytes, 6 bytes.
Ø CS part 2 is another 6 bytes component security bytes. There’s 12 bytes component security bytes in Gearbox and J518. If you read J518 EEPROM with working key support in 9S12DT128 type, it will show 6 bytes CS part 2
Ø There’s component protection for 2nd hand J518. You must learn 2nd hand to car before adapt unit. You can find this in chapter 6.5 component protection
(PICTURE 6.6)
(PICTURE 6.7)
u 4th immobilizer system ECU (EDC16/EDC17/MED9/MED17/Simos/ME7)
Ø You can select autodetect engine control unit existing to get PIN/CS or type in known PIN/CS manually
Ø Press button “Read” (PICTURE 6.6), it will complete search power class for several minutes
Ø After success read power class you get window (PICTURE 6.7)
Ø Input new Immo No, VIN, CS, PIN, press button “Write”. It can synchronize immobilizer with ECU automatically after write success. Note: for the synchronization process, you must have a key recognized by immobilizer system
Ø Please don’t change the 7th byte CS, most car ECU only have 6 bytes CS, 7th byte is always “00”
Ø The ECU power class doesn’t support change via adapt unit. You can try with ECU Flash in diagnostics to change power class (You need have a correct flash file)
u Kessy in Audi A8, VW Touareg/Phaeton
Ø You can load EEPROM dump (93C86) for 2nd hand Kessy (support car before 2009), or type in known PIN/CS manually
Ø Press button “Read” (PICTURE 6.6). It requires input power class for 2nd hand module (PICTURE 6.8). Attention: the working key in 2nd hand Kessy will stop work after success reading, it can start work after write with correct 7 bytes CS. This usually happen for adapt original Kessy module in car, because the Kessy have working key
Ø Input new Immo No, VIN, power, total 7 bytes CS, PIN, press button “Write”
Ø Note: Kessy power class can change via adapt unit
(PICTURE 6.8)
u Passat B6/CC Comfort module
Ø You can load EEPROM dump (95320) for 2nd hand comfort module, or type in known PIN/CS manually
Ø Press button “Read” (PICTURE 6.6). It requires input power class for 2nd hand module (PICTURE 6.8). Attention: the working key in 2nd hand comfort module will stop work after success reading, it can start work after write with correct 7 bytes CS. This usually happen for adapt original comfort module in car, because the comfort module have working key
Ø Input new Immo No, VIN, power, total 7 bytes CS, PIN, press button “Write”
Ø Note: Comfort module power class can change via adapt unit
u A6/Q7/Allroad Transmission gearbox
Ø You can load EEPROM dump (EZS-Kessy J518) for 2nd hand J518, or type in known PIN/CS manually
Ø Press button “Read” (PICTURE 6.9). It requires input power class for 2nd hand module (PICTURE 6.8). Attention: it you start with known PIN/CS, the 2nd hand gearbox will stop work after success reading, it can start work after write with correct CS part 2. This usually happen for adapt original gearbox in car, because the gearbox have CS and CS part 2
Ø Input new VIN, power, CS, CS part2, PIN, press button “Write”. You can get new immo data from the original J518 (which is original equipped on the new car) EEPROM dump (PICTURE 6.9) with function “Load EZS-Kessy dump to which to adapt”
Ø Note: Gearbox power class can change via adapt unit
Ø CS is original component security bytes (6 bytes), CS part 2 is another 6 bytes component security bytes. CS part 2 is use to verify J518 and working key. You’d better fill new immo data with function “Load EZS-Kessy dump to which to adapt”
Ø (PICTURE 6.9) is window for adapt J518, gearbox have the same window, only have different connect unit while adaptation
u Electrical Steering Colum Lock (PQ35)
u You can select autodetect engine control unit (need connect the ECU from car which the 2nd hand module was original equipped) existing to get PIN/CS or type in known PIN/CS manually
Ø Press button “Read” (PICTURE 6.6)
Ø Input new VIN, power, 6 bytes CS (7th byte CS must set “00”), PIN, press button “Write”. It can synchronize immobilizer with ELV automatically after write success. Note: for the synchronization process, you must have a key recognized by immobilizer system
Ø Note: ELV power class can change via adapt unit
u A6/Q7/Allroad EZS-Kessy
Ø You can load EEPROM dump (EZS-Kessy J518) for 2nd hand J518, or type in known PIN/CS manually
Ø Press button “Read” (PICTURE 6.9). It requires input power class for 2nd hand module (PICTURE 6.8). Attention: it you start with known PIN/CS, the working key in 2nd hand J518 will stop work after success reading, it can start work after write with correct CS part 2. This usually happen for adapt original J518 in car, because the J518 have working key
Ø Input new Immo No, VIN, power, CS, CS part2, PIN, press button “Write”. You can get new immo data from the original J518 (which is original equipped on the new car) EEPROM dump (PICTURE 6.9) with function “Load EZS-Kessy dump to which to adapt”
Ø Note: J518 power class can change via adapt unit
Ø CS is original component security bytes (6 bytes), CS part 2 is another 6 bytes component security bytes. CS part 2 is use to verify gearbox and working key. You’d better fill new immo data with function “Load EZS-Kessy dump to which to adapt”
Ø Attention: EZS-Kessy J518 has component protection, you must learn the 2nd module to car before adapt unit. Detail can be found in chapter 6.5 Component protection
(PICTURE 6.9)
6.5. Component Protection
6.5.1. Generation 1 component protection
Generation 1: Audi A8 (2003-2010) control unit, Audi A6/Q7/Allroad (2004-2008) part control unit. Support following types (PICTURE 6.13):
1) Audi A6/Q7 (2004-2009) - 07 - Control Head (MMI)
2) Audi A6/Q7 (2004-2009) - 09 - Central electric (ILM Fahrer)
3) Audi A6/Q7 (2004-2009) - 0E - Media Player 1 (MP3 CD Changer)
4) Audi A6/Q7 (2004-2009) - 18 - Auxilary Heater
5) Audi A6/Q7 (2004-2009) - 46 - ILM Front passenger (ILM Beifahrer)
6) Audi A6/Q7 (2004-2009) - 06 - Seat Memory Passenger
7) Audi A6/Q7 (2004-2009) - 36 - Memory module (Driver's seat)
8) Audi A8 (2003-2006) - 17 - Instrument Cluster
9) Audi A8 (2003-2010) - 06 - Seat Memory Passenger
10) Audi A8 (2003-2010) - 36 - Memory module (Driver's seat)
11) Audi A8 (2003-2010) - 47 - DSP Bang & Olufsen
Steps for generation 1:
1) Require 2nd hand device EEPROM dump. Item 8) can read by OBDII, other item need read EEPROM dump with BDM programmer
2) After decrypt 2nd hand device EEPROM dump, we need new car component protection data. Accord car type there are 2 methods:
Ø For A6/Q7/Allorad vehicles: You can load new car J518 EEPROM, of course you can read this EEPROM by OBDII
Ø For A8 vehicles: We need connect to internal CAN line to obtain component protection data. Following the picture: SVDI2 DB25 line (PICTURE 6.11), internal CAN line (PICTURE 6.12) (under driver’s seat), connect the line one by one. Then press button “Read” in (PICTURE 6.10). After success read, before continue you need connect SVDI2 DB25 interface to car OBDII
3) After read component protection data success from new car. Just follow programs’ message and NEXT to learn the 2nd hand device to new car
(PICTURE 6.10) (PICTURE 6.11)
(PICTURE 6.12) (PICTURE 6.13)
6.5.2. Generation 2 component protection
Generation 2: Audi A6/Q7/Allroad other control unit, Audi A4/A5/Q5 control unit (PICTURE 6.13) Now we support following modules: Entry And Start Authorization, Airbags, Instruments, Central Electric, Central Comfort Module, Seat Memory Driver, Auto HVAC, Auxiliary heater, Seat memory passenger, Sound System, Control head, Information Electric, Radio etc
(PICTURE 6.14)
Steps for generation 2:
1) Connect SVDI2 to car via OBDII, press button “Start”. (PICTURE 6.14) is one scan result
u Status show Adapt to car means unit is already adapt to car
u Status show No Component protection means unit don’t have component protection function
u Status show Virgin means unit is new module, it is ready to learn
2) Select destination unit and press button NEXT
u For the Adapt to car module we need reset module to virgin, we provide 4 methods (PICTURE 6.15):
Ø By module EEPROM dump read by OBDII (available for EZS-Kessy, KOMBI, AIRBAG, Comfort module and Climatronic) (First time read climatronic via OBDII need reflash module)
Ø By module EEPROM dump (available for EZS-Kessy and AIRBAG)
Ø By GATEWAY EEPROM dump (available for all devices, requires the GATEWAY EEPROM dump from the car where module was originally equipped)
Ø By GATEWAY EEPROM read by OBD (available for all devices, requires the GATEWAY from the car where module was originally equipped, to be connected in the car. It may need reflash GATEWAY for the first time, flash need about 2 minutes)
u After success reset module to virgin, turn to step 3), enter learn module to car (PICTURE 6.16)
3) For virgin module, enter learn module to car (PICTURE 6.16)
u To learn the specified module to the vehicle, you need the EEPROM dump of the GATEWAY module from the car where you want to build the module
Ø Load GATEWAY EEPROM dump (Load the new vehicle GATEWAY EEPROM dump)
Ø Read by OBDII (Requires connect to new car, and will reflash GATEWAY for first time read (about 2 minutes))
u After you read GATEWAY EEPROM success, press button NEXT to complete learn operation
4) After the 2nd module learn to car, it works now
(PICTURE 6.15) (PICTURE 6.16)
6.6. EEPROM Dump Tool
(PICTURE 6.17) accord to the load EEPROM dump, it mainly has following functions: ECU EEPROM: Decrypt for PIN, CS, MAC, set new PIN, CS, MAC value Immobox EEPROM: Kessy(93C86), J518, Comfort module dump, decrypt for PIN, CS, Immo No. VIN etc Instrument EEPROM: Decrypt for PIN, KM, and set new KM
(PICTURE 6.17)
Support following types:
1) IMMO - KESSY - Audi A8, VW Touareg, VW Phaeton, Porsche Cayenne, Bentley Continental [93C86]
2) EZS-Kessy Security access code / component protection data [9S12]
3) Passat B6 Comfort module component protection data [95320]
4) ECU Magneti Marelli(MM7GV, used in part NEC35xx type) PIN and component protection data [95320]
5) ECU EDC16 Set component protection data [95320]
6) ECU EDC16 Immo bypass [95320]
7) ECU EDC16 Mileage calculator [95320]
8) ECU EDC16 Security access code / Checksum calculator [95320]
9) ECU EDC16 Speed Limiter [95320]
10) ECU EDC16 Make virgin [95320]
11) ECU MED 9.x Reset component protection data [95160]
12) ECU MED 9.x Security Code / Checksum calculator [95160]
13) ECU MED 9.x Reset component protection data [95080]
14) ECU MED 9.x Security Code / Checksum calculator [95080]
15) ECU MED 9.x Reset CRYPTED Login/Component protection
16) ECU MED 9.x Reset flash counters
17) ECU MED 9.x Immo Bypass
18) ECU ME 7.x Set component protection data [9P08/95080]
19) ECU ME 7.x Security Code / Checksum calculator [9P08/95080]
20) ECU ME 7.x Immo Bypass [9P08/95080]
21) ECU EDC15 Immo bypass [24C04]
22) Gateway Mileage resetter [95160]
23) Steering lock VW Passat 6 Security code [68HC908]
24) ECU Simos Benzin - Immo bypass
25) ECU Simos 7 - K-line - Login code [93C76] [93C86]
26) ECU Simos 7 - CAN - Security Access Code [93C76] [93C86]
27) ECU Simos 7 - CAN - Reset component protection data [93C76] [93C86]
28) ECU Simos 6.x - Security Access Code
29) ECU Simos 6.x - Reset component protection data
30) ECU Simos PPD1x - Reset component protection data
31) ECU Simos PPD1x - Mileage calculator
32) ECU Simos PPD1x - Security Access Code
33) ECU Simos 9.1 - Reset component protection data
34) ECU Simos 9.1 - Security Access Code
35) ECU Simos 9.2 - Reset component protection data
36) ECU Simos 9.2 - Security Access Code
37) ECU Simos 6.3 - Reset component protection data
38) ECU Simos 6.3 - Security Access Code
39) ECU Simos 3.3 - Security Access Code and CS bytes
40) ECU Magneti Marelli Security Access Code [95320]
41) ECU Magneti Marelli - Reset component protection data [95320]
42) ECU Magneti Marelli Security Access Code [95080]
43) ECU Simos 9.1 (Polo 2007) - Security Access Code
44) ECU Bosch M3.x - Immo bypass
45) ECU MSA1x - Immo bypass
46) IPC VDO VW/Seat/Skoda (2007+) Micronas
47) IPC - CRYPTO Skoda Fabia, Skoda Roomster, VW Polo, Seat Ibiza [ 93C86 ]
48) Magneti Marelli MM4 Instrument mileage and login code [HC12]
49) Audi A3/A4/A6 UKNSI 1995-1997 mileage and login code [93C56]
50) Audi A3/A4/A6 UKNSI 1997-1998 mileage and login code [93C56]
51) Audi A3/A4/A6 UKNSI Japan mileage and login code [93LC56]
52) Audi 100 VDO 1995 mileage [94C46]
53) Golf 3 VDO 1995 mileage [93C46]
54) Golf 3 VDO V3.9 mileage [93C46]
55) Golf 3 Diesel mileage [93C46]
56) Golf 3 Motometer V5.8 mileage [93C56]
57) Polo Motometer mileage [93C46]
58) Polo Motometer 1996 mileage [93C66]
59) Passat VDO 1991 mileage [93C56]
60) Passat VD202 1993 mileage [93C46]
61) Passat GT mileage [93C46]
62) Passat GT mileage [93C56]
63) Caddy mileage [93C56]
64) Corrado VDO 1993 mileage [93C46]
65) Corrado MotoMeter 1991-1995 mileage [93C56]
66) Corrado VDO 1991-1995 mileage [93C56]
67) Jetta 1994-1996 mileage [93C46]
68) T4 MotoMeter 1996-1997 mileage [93C56]
69) Audi A8 (-2002) - Security access code [24c17]
70) Audi A8 (-2002) - Mileage calculator [24c17]
71) Polo TRW [24c08] - Security access code
72) Black immobilizer box VALEO 24C04 - Security access code
SVDI2 - BMW User Manual
1. Document Declaration. 1
2. Overview.. 1
2.1. Noun explanation. 1
2.2. Options. 2
2.3. EEPROM/KM/Synchronization Codes (OBD) 2
2.4. Key Learn. 3
2.5. File Make Key. 3
2.6. Unlock Key. 3
2.7. File Change KM.. 3
2.8. CAS Repair. 3
2.9. CAS PLUG.. 4
3. Options. 4
3.1. Language. 4
4. EEPROM/KM/Synchronization Codes (OBD) 4
5. Key Learn. 7
5.1. Overview.. 7
5.1.1. CAS1/CAS2/CAS3/CAS3+ Function. 7
5.1.2. CAS4 Function. 10
5.2. Special note in OBD operation (Important!!!) 11
5.3. CAS1/CAS2/CAS3 make dealer key by OBDII 15
5.4. CAS3+ not encrypt version make dealer key by OBDII 15
5.5. CAS3+ encrypt version (include ISTAP) make dealer key by OBDII 16
5.5.1. Add new key with working key. 16
5.5.2. Lost All Key. 17
6. File Make Key. 18
6.1. Special note in File Make Key (Important!!!) 18
6.2. EWS1/EWS2/EWS3/EWS4/CAS1/CAS2/CAS3 (include lost all key) 21
6.3. CAS3+ (include lost all key) 22
6.4. CAS4 (CAS4+) (include lost all key) 23
7. Unlock Key. 24
8. File Change KM.. 25
9. CAS Repair. 27
9.1. CAS1 (0K50E) OBDII Repair. 27
9.2. ISTA-P4* OBDII Repair. 27
10. CAS PLUG.. 28
10.1. CAS PLUG Overview.. 28
10.2. Make old CAS PLUG work on SVDI2. 29
10.3. CAS PLUG connect to EWS/CAS. 31
10.4. Manual line to achieve CAS PLUG.. 34
1. Document Declaration
Please view the following declaration carefully:
u SVDI2 – BMW User Manual can help you maintenance vehicles with SVDI2 device. Please DON’T used for illegal purpose, Please follow the national law
u SVDI2 – BMW User Manual is written by SVDI2, please DON’T used for commercial purposes without authorize
u SVDI2 – BMW User Manual can help you how to use BMW software, please view carefully
u Any illegal use SVDI2 – BMW User Manual, illegal use SVDI2 device, The user should take all risks, the company does not assume any responsibility
2. Overview
Mainly function shown in (PICTURE 2.1):
(PICTURE 2.1)
2.1. Noun explanation
u BMW: Bayerische Motoren Werke
u EWS: Immobox used in earlier BMW cars
u CAS: Car Access System(40 unit), mainly include CAS1(0K50E), CAS2(2K79X), CAS3(0L01Y), CAS3+(0L15Y, 0M23S), CAS4(1L15Y, 5M48H), this document will only use CAS1, 2, 3, 3+, 4, 4+ to express, don’t write detail mask. If document have detail mask indicates the special explain to this type
u FEM: The latest immobox used in BMW cars. Now SVDI2 don’t support this type
u OBDII method: connect SVDI2 to car with OBDII interface
u CAS PLUG: It is not a standard device, need buy for extra. Communication with CAS through CANBUS 100Kbps. Detail can be found in chapter 10 CAS PLUG
u CAS3+ encrypt version: Sometimes we call CAS3++. When the car (not encrypt version) start, CAS will verify key, engine will verify CAS. But for CAS3++ type, engine will verify key in addition. So add key for this type need working key or ISN support. For the above reason, the introduction for CAS3+ is also applicable for CAS3+ encrypt version. Expect write no applicable for CAS3+ encrypt version
u ISTAP Version: Strictly, ISTAP belong to CAS3+ encrypt version, the only different is that we cannot read CAS immodata by OBDII for ISTAP version. Fortunately, we can OBDII read ISTAP CAS immodata by update CAS flash. SVDI2-BMW update ISTAP version flash only need 10 minutes. So the introduction for CAS3 encrypt version also applicable for ISTAP version, expect write not applicable for ISTAP
u ISN: Identification Serial Number, this value use to verify engine with key. 16 bytes
u Known CAS3+ encrypt version(not ISTAP) SN: 9226238, 9227053, 9237046, 9237047
u Known ISTAP version SN: 9262360, 9262361, 9278745, 9278746, 9287534, 9287535, 9267608, 9267609
u Lost all key: The car lost all working key, there is big different from add key with working key. Note: before OBDII communication, you need open dangerous light, press on the brakes for several times to active OBD communication
2.2. Options
Detail can be found in chapter 3 Options
u Language
u About…
2.3. EEPROM/KM/Synchronization Codes (OBD)
Detail can be found in chapter 4 EEPROM/KM/Synchronization Codes (OBD)
u Read EEPROM / Write EEPROM
u Read KM / Write KM
u Synchronize DME-CAS, CAS-ELV
2.4. Key Learn
Detail can be found in chapter 5 Key Learn
u Get Key Info
u Write Key Info
u Load Key Info / Save Key Info
u Prepare dealer key with programmer
u Prepare dealer key with ignition switch
u Add key
u Program Key Info
u Repair Keyless Key
u Enable Key / Disable Key
u Clear DTC / Clear Shadow
2.5. File Make Key
Detail can be found in chapter 6 File Make Key
u EWS1/EWS2/EWS3/EWS4
u CAS1/CAS2/CAS3/CAS3+/CAS4
2.6. Unlock Key
Detail can be found in chapter 7 Unlock Key
u Unlock with key info file
u Unlock with CAS1/CAS2/CAS3/CAS3+ EEPROM
2.7. File Change KM
Detail can be found in chapter 8 File Change KM
u EWS3/EWS4
u CAS1/CAS2/CAS3/CAS3+ CAS4
u Cluster (E Series): M35080 EEPROM dump
u Cluster (F Series)
2.8. CAS Repair
Detail can be found in chapter 9 CAS Repair
u CAS1(0K50E) OBDII Repair
u ISTAP4* Version OBDII Repair
2.9. CAS PLUG
Detail can be found in chapter 10 CAS PLUG
3. Options
3.1. Language
Support following languages:
u Chinese (Simplified)
u English
u Italian
u Spanish
u German
u Hungarian
Please manual set user language after first run program
4. EEPROM/KM/Synchronization Codes (OBD)
OBD main window (PICTURE 4.1), Support following functions:
u Auto Detect: Auto detection communication protocol, support KWP-E6X…, CAN bus 100Kbps, CAN bus 500Kbps. Other functions need choose manually
u OBDII KWP – E6X, E7X, E9X, E81, E82, E87, E89: Usually used in old cars with CAS1, CAS2 and some CAS3
u KWP – CAN bus 100Kbps: This type will be use when your SVDI2 connect to CAS with CAS PLUG or without gateway
u KWP – CAN bus 500Kbps: This type will be use when connect to car with CAS3, CAS3+
u BMW EWS KLine: When connect EWS with CAS PLUG, choose this type
u BMW F-Series: This type can connect to CAS4 in BWM F-Series
(PICTURE 4.1)
u Connect: Connect to CAS system. Attention: EWS don’t support this (see special note 1). After connect to CAS, there will display detail information in CAS identification (PICTURE 4.2). When you choose Auto Detect, only connect support, it will detect the connection type: KWP, CANBUS 100, CANBUS500. You must choose
another type before other operation
u CAS identification:
Ø CAS ID: CAS identification number
Ø CAS type: CAS type is very important, this type is detected by SVDI2-BMW, If the type detect incorrect,add new key may not work. Usually have the following types: CAS1, CAS2, CAS3/CAS3+, CAS3++, CAS3++ (ISTAP), CAS4 etc.
CAS3/CAS3+: This means CAS should be CAS3 (0L01Y) or CAS3+(0L15Y)(not encrypt version) CAS3++: This means detected CAS3+ encrypt version CAS3++ (ISTAP): find ISTAP version
Ø VIN: Vehicle identification number
Ø Prod. Date: CAS production date
Ø HW: CAS hardware version
Ø FSV: Function software version in CAS
Ø OSV: Operation software version in CAS
(PICTURE 4.2)
u Read EEPROM: Support Read CAS1/CAS2/CAS3/CAS3+ (ISTAP version not support) EEPROM. For CAS1/CAS2/CAS3 type require CAS PLUG; CAS3+ can use OBDII or CAS PLUG. Attention: the read EEPROM for CAS3+ is not the whole EEPROM, You can’t write it to CAS with BDM programmer, it can use to prepare dealer key with File Make Key
u Write EEPROM: Support write CAS1/CAS2/CAS3 EEPROM dump by OBDII,
requires CAS PLUG
u Save to File… / Load From File…: Save the reading data / load EEPROM dump to buffer
u Read KM: Read KM stored in CAS system, support CAS1/CAS2/CAS3/CAS3+ (ISTAP version not support). CAS1, CAS2, CAS3 require CAS PLUG; CAS3+ can access by OBDII and CAS PLUG
u Write KM: Write new KM to CAS, support CAS1/CAS2/CAS3/CAS3+ (ISTAP version not support). CAS1, CAS2, CAS3 require CAS PLUG; CAS3+ can access by OBDII and CAS PLUG
Attention: KM shown on instrument stored not only in instrument, but also in CAS system, it can synchronize CAS with cluster for the bigger one. So, when you want change KM, you’d better take instrument away from car, Set CAS KM to 0, read EEPROM dump from instrument, change instrument EEPROM KM to new one with File Change KM function, write the new EEPROM dump to instrument and put your instrument in car
u Read Code: Read DME and EGS code stored in CAS
u Write Code: Write DME and EGS code to CAS system. Attention: We don’t recommend general user write this code, the car will stop working if write error code
u Synch DME-CAS: Synchronize DME and CAS. Don’t do this operation if you lost all working key. Sometimes add new key for CAS1/CAS2/CAS3 will lost synchronization code, then you can run this operation, see Special Note 2
u Synch CAS-ELV: Synchronize CAS and ELV, This function can be run once ELV has error; Sometimes add new key for CAS1/CAS2/CAS3 will cause ELV error,then you can run this operation, see Special Note 2
u Key Learn: Detail can be found in chapter 5 Key Learn
u Special Note 1: Read/Write EWS now support 0D46J mask and 2D47J mask. EWS support read EEPROM, write EEPROM, File Make Key, File Change KM etc
u Special Note 2: Sometimes add new key for CAS1/CAS2/CAS3 will cause car not start, you need synchronize DME and CAS, synchronize CAS and ELV, insert original key to ignition switch, run this 2 operation one by one, take key off, insert again and try to start. If not start, try this again until car start. If you get error in synchronize progress, ignore and continue
5. Key Learn
5.1. Overview
5.1.1. CAS1/CAS2/CAS3/CAS3+ Function
Key Learn have window like (PICTURE 5.1).
(PICTURE 5.1)
Mainly Function:
u Key cutting code: Key This code can help make the key stick, you can use CONDOR Automatic Key Cutting Machine make the key stick directly (Lost All Key is very convenient, no need change cylinder)
u CAS remote control frequency: You need select correct remote key accord this value, they must have same frequency. Of course you can test working key frequency with Remote Frequency Test( “F” button on SVDI2 device)
u CAS key in ignition switch is: The position at immobilizer for ignition key. Another way is read key ID with SVDI2 – Transponder Programmer HITAG2 type, compare the key ID with IDs in key info
u Get Key Info: OBD read key cutting code, CAS remote control frequency, CAS key in ignition switch is, key info etc. You must read and backup original key info before OBD prepare key
u Save Key Info: Save the key info read by OBDII, the file is encrypted
u Load Key Info: Load key info read by SVDI2-BMW, you can write this key info to CAS system by OBD
u Write Key Info: Write the loaded key info to CAS system, it can use for restore original key info
u Prepare dealer key with programmer: After read key info success, select a key position, prepare dealer key with SVDI2 programmer
u Prepare dealer key with ignition switch: After read key info success, select a key position, prepare dealer key with ignition switch
u Add Key: Add the new prepared key to CAS system. Most of the car, the new prepared key can start engine directly without add key; there’s still a few car can’t identification new key, at this situation you need add key to CAS system, key should be placed in SVDI2 programmer
u Program Key Info: After you read key info or load key info, select a specify key item, run this operation to change detail item (PICTURE 5.2). Attention: We don’t recommend general user run this operation, the working key will stop work if write error data
(PICTURE 5.2)
u Repair Keyless Key: If the keyless key doesn’t have smart function after start engine. You can try this operation to fix it. Detail operation can follow (PICTURE 5.3). Attention: you must have one un-keyless key and this key can start engine
(PICTURE 5.3)
u Enable Key: Insert a working key to ignition switch, select key position which you want enable, press button Enable Key. If there’s a key for this position, it will start work again. Attention: Enable Key don’t need to read key info
u Disable Key: Insert a working key to ignition switch, select key position which you want disable, press button Disable Key. If there’s a key for this position, it will stop work, add key new at this position is also not work. Attention: Disable Key don’t need to read key info
u Clear DTC: Clear the DTCs in CAS system
u Clear Shadow:Clear the Shadows in CAS system
5.1.2. CAS4 Function
Key Learn have window like (PICTURE 5.4).
(PICTURE 5.4)
BMW F-Series cars with CAS4 system don’t support prepare dealer key by OBD. You need use File Make Key function to load the CAS4 EEPROM dump (BIN file). You’d better read this with “VVDI – PROG” (one BDM programmer) Mainly Function:
u Current key in ignition switch is: The position at immobilizer for nearby ignition key. Another way is read key ID with SVDI2 – Transponder Programmer HITAG Pro type, compare the key ID with IDs in key info
u Get Key Info: OBD read key current key in ignition switch is, read all key ID and status (enable or disable). Note: This operation cannot read immo data
u Enable Key: Insert a working key to ignition switch, select key position which you want enable, press button Enable Key. If there’s a key for this position, it will start work again
u Disable Key: Insert a working key to ignition switch, select key position which you want disable, press button Disable Key. If there’s a key for this position, it will stop work, add key new at this position is also not work
5.2. Special note in OBD operation (Important!!!)
u Under Get Key Info get window (PICTURE 5.5): For CAS3+ encrypt version, must select add key or lost all key. For other CAS version, this 2 method is same, they don’t have lost all key mode, add key is always
(PICTURE 5.5)
u Under OBD operation get window (PICTURE 5.6): If there’s key in ignition switch, take away. If the key is keyless key (smart key), move it out of car. If there’s no key in ignition, just press OK to continue
(PICTURE 5.6)
u Under prepare dealer key get window (PICTURE 5.7): Once you get this window, SVDI2-BMW detect this CAS is CAS3+ encrypt version. If you sure CAS is encrypt version, but there’s no this window while prepare dealer key, the made key may not start engine. You’d better choose “File Make Key” for the error detection CAS
(PICTURE 5.7)
u Under prepare dealer key with ignition switch get window (PICTURE 5.8): Here we need pre-process new key. Just follow step1 to step4. Attention: You must insert new key into ignition switch before NEXT
(PICTURE 5.8)
u Under prepare dealer key(File Make Key also have this) get window (PICTURE 5.9): Please select correct type, if smart key select NO, the keyless function will not work
(PICTURE 5.9)
u Under prepare a keyless key (File Make key also have this) get window (PICTURE 5.10) or (PICTURE 5.11): Make sure the car have 1 keyless key at most before add new keyless key. The lost keyless key should disabled or erased. Attention: (PICTURE 5.10)will come with add key, this situation keyless key don’t support unlock;
(PICTURE 5.11)will come with lost all key, here the keyless key can unlock by SVDI2-BWM
(PICTURE 5.10)
(PICTURE 5.11)
u After make dealer key get window (PICTURE 5.12): When you get this window, the key was made successfully. You can try to start engine directly. If not work, you need add this key to CAS system with Add Key. Keyless can fixed with Repair Keyless Key
(PICTURE 5.12)
u After add key to CAS get window (PICTURE 5.13): When you get this window, the key was add to CAS system successfully. Key can start engine now. Sometimes add new key for CAS1/CAS2/CAS3 will cause car not start, you can follow chapter 4 Special Note 2
(PICTURE 5.13)
u Under lost all key for CAS3+ encrypt version (File Make key also have this) get window (PICTURE 5.14) or (PICTURE 5.15): For CAS3+ encrypt version, lost all key will have a special procedure to make working key (this procedure maybe need load EEPROM dump). By insert temp key to ignition and try start. (PICTURE 5.14) is CAS3+ encrypt version (not ISTAP) window, at most 16 times try start. (PICTURE 5.15) is ISTAP version window, at most 64 times try start
Attention: For ISTAP version, There is a few car can’t find useful combine data after 64 times try start, because the CAS lost some verify data, you need select File Make Key->Known ISN to make working key Attention: If you press “Yes” and get something like “Cannot find useful combine data, please check the EEPROM file”, means the CAS lost some verify data, you need select File Make Key->Known ISN to make working key
(PICTURE 5.14)
(PICTURE 5.15)
u Under lost all key for CAS3+ encrypt version (File Make key also have this) get window (PICTURE 5.16): In the tile you can find “Try times 5” means this is the fifth try start. If can start, press “YES”,key made successfully. If cannot start, press “NO”, continue next try start
For some reason cause not find start combine data after all try, the temp key is locked, you need unlock the key with EEPROM or key info before next time test. Attention: when you get this window, you’d better try with this method: insert temp key to ignition switch, try start, if not start, take key off, then insert to ignition again, try start again, if still not start, take key off ignition and press “No” (In File Make Key you need place temp key in programmer)
(PICTURE 5.16)
5.3. CAS1/CAS2/CAS3 make dealer key by OBDII
u Attention: Under these steps, there will come some ASK or NOTE message, they all can be found in chapter 5.2
u Prepare new key steps: Lost all key is same with add key
1) In (PICTURE 4.1), use Connect to detect CAS type and read CAS identification information
2) In (PICTURE 4.1) , use Key Learn enter key learn window (PICTURE 5.1)
3) In (PICTURE 5.1), use Get Key Info read CAS immo data, cutting code, remote frequency and etc
4) In (PICTURE 5.1), use Save Key Info save the read key info
5) There’s 2 methods for make key:
Ø Method 1: In (PICTURE 5.1), select Prepare dealer key with programmer
a) Input a new blank key to SVDI2 programmer
b) Select a key position for new key (If the selected position have key already, must use Add Key to add new key to CAS system)
c) In (PICTURE 5.1), press button Prepare dealer key with programmer wait procedure complete
d) After make dealer key successful, try start directly. If can start engine, turn to step 6). If not work, add the made key to CAS system with Add Key in (PICTURE 5.1)
e) After new key can start engine turn to step 6). Attention: Sometimes add new key for CAS1/CAS2/CAS3 will cause car not start, you can follow chapter 4 Special Note 2
Ø Method 2: In (PICTURE 5.1), select Prepare dealer key with ignition switch, select key type and pre-process the blank key, insert to ignition switch and wait complete. After finish, turn to step 6). If you get failure here, you need unlock the key with key info before next make dealer key
6) In (PICTURE 5.1), clear trouble codes with Clear DTC and Clear Shadow
7) Complete
5.4. CAS3+ not encrypt version make dealer key by OBDII
u Attention: Under these steps, there will come some ASK or NOTE message, they all can be found in chapter 5.2
u Method 1, operation: lost all key is same as add key with working key, you can follow chapter 5.3
u Method 2, operation: lost all key is same as add key with working key
1) Read EEPROM with Read EEPROM in (PICTURE 4.1) by OBDII
2) Make dealer key with File Make Key function
5.5. CAS3+ encrypt version (include ISTAP) make dealer key by OBDII
5.5.1. Add new key with working key
u Attention: Under these steps, there will come some ASK or NOTE message, they all can be found in chapter 5.2
u Method 1, operation: This method support CAS3+ encrypt version (ISTAP not support). you can follow method 2 in chapter 5.4
u Method 2, operation:
1) Insert a working key to car ignition and switch ON
2) In (PICTURE 4.1), use Connect to detect CAS type and read CAS identification information (Remember: Write down CAS ID)
3) In (PICTURE 4.1) , use Key Learn enter key learn window (PICTURE 5.1)
4) In (PICTURE 5.1), use Get Key Info read CAS immo data, cutting code, remote frequency and etc. (Remember: when you get window (PICTURE 5.5), you need choose Add Key)
Attention: The key info can read directly if CAS isn’t ISTAP version. If CAS belongs to ISTAP version, there will be update CAS flash window (PICTURE 5.17) for the first time read key info. Upgrade CAS flash only need 10 minutes, after update flash turn to step 5). If the upgrade progress failed by some reason, you can fix it with Menu->CAS Repair->ISTAP4* version OBDII Repair. Repair with CAS ID (write in step2)). Detail can be found in chapter 9 CAS Repair
(PICTURE 5.17)
5) In (PICTURE 5.1), use Save Key Info save the read key info
6) There’s 2 methods for make key:
Ø Method 1: In (PICTURE 5.1), select Prepare dealer key with programmer
a) Input a new blank key to SVDI2 programmer
b) Select a key position for new key (If the selected position have key already, must use Add Key to add new key to CAS system)
c) In (PICTURE 5.1), press button Prepare dealer key with programmer wait procedure complete
d) After make dealer key successful, try start directly. If can start engine, turn to step 6). If not work, add the made key to CAS system with Add Key in (PICTURE 5.1)
e) After new key can start engine turn to step 7). Attention: Sometimes add new key for CAS1/CAS2/CAS3 will cause car not start, you can follow chapter 4 Special Note 2
Ø Method 2: In (PICTURE 5.1), select Prepare dealer key with ignition switch, select key type and pre-process the blank key, insert to ignition switch and wait complete. After finish, turn to step 7). If you get failure here, you need unlock the key with key info before next make dealer key
7) In (PICTURE 5.1), clear trouble codes with Clear DTC and Clear Shadow
8) Complete
5.5.2. Lost All Key
u Attention: Under these steps, there will come some ASK or NOTE message, they all can be found in chapter 5.2
u Operation steps:
1) Active OBD communication with lost all key method
2) In (PICTURE 4.1), use Connect to detect CAS type and read CAS identification information (Remember: Write down CAS ID)
3) In (PICTURE 4.1) , use Key Learn enter key learn window (PICTURE 5.1)
4) In (PICTURE 5.1), use Get Key Info read CAS immo data, cutting code, remote frequency and etc. (Remember: when you get window (PICTURE 5.5), you need choose Lost All Key)
Attention: The key info can read directly if CAS isn’t ISTAP version. If CAS belongs to ISTAP version, there will be update CAS flash window (PICTURE 5.17) for the first time read key info. Upgrade CAS flash only need 10 minutes, after update flash turn to step 5). If the upgrade progress failed by some reason, you can fix it with Menu->CAS Repair->ISTAP4* version OBDII Repair. Repair with CAS ID (write in step2)). Detail can be found in chapter 9 CAS Repair
5) In (PICTURE 5.1), use Save Key Info save the read key info
6) In (PICTURE 5.1), select Prepare dealer key with ignition switch, select key type and pre-process the blank key, insert to ignition switch and wait complete. The procedure will use try start method, if CAS belongs to ISTAP there will be at most 64 time try start, while the not ISTAP version have at most 16 times try start. Once the engine start, turn to step 7). If you get failure here, you need unlock the key with key info before next make dealer key.
7) After success start engine, you will get window (PICTURE 5.18). Remember: Don’t take away the key from ignition switch. Synchronize DME-CAS (PICTURE 4.1) at least 10 times. Once you get “Don’t synchronize when you have working key” continue. If you got sync failed, don’t worry about this, the sync command is send. If you don’t complete this procedure, your new key may not start engine for second time
8) In (PICTURE 5.1), clear trouble codes with Clear DTC and Clear Shadow
9) Complete
(PICTURE 5.18)
6. File Make Key
6.1. Special note in File Make Key (Important!!!)
u Prepare dealer key, keyless key, lost all key for CAS3+ encrypt version have some note in chapter 5. 2 Special note in OBD operation (Important!!!)
u Load CAS EEPROM dump get window (PICTURE 6.1): If the dump is read by BDM programmer, you can ignore this window. That means SVDI2 – BMW detected verify error in CAS system. Usually CAS3+ encrypt version have this window
(PICTURE 6.1)
u Under make dealer key for CAS3+ encrypt version get (PICTURE 6.2):
Ø Add key with working key select Have a working key.
Ø Lost all working key, there are 3 methods:
1) Have ECU dump file, load ECU dump file to continue
2) Known ISN, input 16 bytes ISN to continue
3) Use try start method, try start method don’t need OBD communication, only require the original CAS EEPROM dump
(PICTURE 6.2)
u Under make dealer key for CAS4 encrypt version get (PICTURE 6.3):
Ø Add key with working key select Have a working key.
Ø Lost all working key, there are 3 methods:
1) Have ECU dump file, load ECU dump file to continue
2) Known ISN, input 16 bytes ISN to continue
(PICTURE 6.3)
u About remote function not work in CAS1/CAS2/CAS3/CAS3+: Remote not work caused by synchronization codes not same between key and CAS, just need do the synchronize operation: Press any button on new key, now remote function not work, start engine with this key for several seconds, switch off ignition, try remote again, works
u About write back new dump after make key for CAS1/CAS2/CAS3/CAS3+:
Ø File make key not detected the key is disabled or not. If your key not work, you’d better enable the new key position with working key(Direct enable key without get key info)
Ø If select a blank position for new key, usually don’t require write back new dump. If not work,test write back method
Ø If select a used position for new key, you must write new dump back to CAS
u Please don’t choose 10th key for CAS3+ encrypt version
u Under lost all key for CAS3+ encrypt version get window (PICTURE 6.4): This window will come after first time write key. When you get this window, first try data was written to temp key. Here will save a new dump contain temp key ID. Insert temp key can switch on ignition (you can try for twice, only for cluster show), don’t write new dump back (CAS3+ encrypt version with new key in blank position don’t need write back). If you try several times still can’t switch on, need write back new dump. Note: make sure the new key position is not disabled
(PICTURE 6.4)
6.2. EWS1/EWS2/EWS3/EWS4/CAS1/CAS2/CAS3 (include lost all key)
u Attention: Under these steps, there will come some ASK or NOTE message, they all can be found in chapter 6.1
u Lost all key have same method with add key with working key
u Menu->File Make Key ->select right EWS/CAS type, load EEPROM dump file(BIN file)
u (PICTURE 6.5) is File Make Key window after load EWS3 EEPROM dump. Key Type show with “PCF 7935 EML used” means there already have a key; show with “PCF 7935 EML not use” mean this position doesn’t have key. Select a key position, input blank PCF7935 transponder, press button “Make Dealer Key” and wait complete. The key can start engine without write new dump back, so we don’t have new dump for save
(PICTURE 6.5)
u (PICTURE 6.6) is File Make Key window after load CAS2 EEPROM dump (CAS1, CAS3 is same). Key ID show “FFFFFFFF” means this position not use; show with other values mean there already have a key. Select a key position, input a blank transponder (HITAG2), press button “Make Dealer Key” and wait complete. After finish will save a new dump file. About the write new dump file back you can find
in chapter 6.1 About write back new dump after make key for CAS1/CAS2/CAS3/CAS3+
(PICTURE 6.6)
6.3. CAS3+ (include lost all key)
u Attention: Under these steps, there will come some ASK or NOTE message, they all can be found in chapter 6.1
u Menu->File Make Key->CAS3+ (0L15Y), load EEPROM dump file (BIN file). (PICTURE 6.7) Key ID show “FFFFFFFF” means this position not use; show with other values mean there already have a key. SVDI2 – BMW can auto detect CAS3+ encrypt or not. If not encrypt version, you can follow chapter 6.2 to prepare a dealer key. If CAS3+ is detected as encrypt version, you will get window (PICTURE 6.2), and make dealer key accord following method:
u Add Key with working key: Select a key position, input a blank HITAG2 to SVDI2 programmer, press button “Make Dealer Key” (When get window (PICTURE 6.2), select have a working key type). After finish will save a new dump file. About the write new dump back you can find in chapter 6.1 About write back new dump after make key for CAS1/CAS2/CAS3/CAS3+
u Lost All Key: there’s a special method for lost all key
Ø Select a blank key position, press button “Make Dealer Key”, you will get window (PICTURE 6.2)
Ø If you have ECU EEPROM dump for known ISN value, it become easy. Just load ECU EEPROM dump for type in 16 bytes ISN, next to continue make key
Ø However, most time we don’t have ECU EEPROM dump and don’t know ISN. Fortunately, we have a try start method, this method doesn’t require OBD, only need CAS EEPROM dump file. Select try start method in (PICTURE 6.2) and NEXT
1) According to CAS type is ISTAP version or not, you will get window (PICTURE 5.14) or (PICTURE 5.15), YES to continue
2) Input a blank key to make a temp key, and save new EEPROM dump, get
window (PICTURE 6.4), see the detail for this window in chapter 6.1 Special note in File Make Key
3) Before continue you must place CAS to car. Then we enter try start procedure, see the detail for this window in chapter 5.1 Special note in OBD operation
4) You just need insert temp key to ignition to try start, if not work, place temp key to SVDI2 programmer, then try start again. Loop this operation until find temp key start engine successfully
5) If try all times and still can’t start engine, you need restore CAS to original EEPROM dump and unlock the temp key to blank one ( Unlock can be find in chapter 7 Unlock Key)
(PICTURE 6.7)
6.4. CAS4 (CAS4+) (include lost all key)
u Attention: Under these steps, there will come some ASK or NOTE message, they all can be found in chapter 6.1
u Menu->File Make Key->CAS4 or CAS4 (5M48H), select correct type, load EEPROM dump (BIN file). (PICTURE 6.8) is File Make Key window after load EEPROM dump. Key ID show “FFFFFFFF” means this position not use; show with other values mean there already have a key
CAS4 has 2 masks: 1L15Y and 5M48H
Ø 1L15Y mask: Usually this type belong to not encrypt version. You can load EEPROM dump with any CAS4->F-Series type expect “CAS4->XEP100 MCU (5M48H mask)”
Ø 5M48H mask: This type have encrypt version and not encrypt version. You can load EEPROM dump with “CAS4->XEP100 MCU (5M48H mask)” or “CAS4+(5M48H)”, SVDI2-BMW SVDI2 – BMW can auto detect CAS4+ or not
Ø CAS4+ can load dump with “CAS4+(5M48H)”
u Select a blank key position, input blank key to SVDI2 programmer, press button “Make Dealer Key”. Not encrypt version will complete make key directly. Encrypt
version will get window (PICTURE 6.3), it have 2 method2 for make dealer key:
Ø Add key with working key: When you get window (PICTURE 6.3), select Have a working key:
1) Take away blank key from SVDI2 programmer and input working key
2) Press NEXT, SVDI2 – BMW can read ISN from working key
3) After read ISN success, take away working key from SVDI2 programmer and insert blank key accord SVDI2 – BMW message
4) Continue to finish make dealer key
Ø Lost All Key: (Only 5M48H encrypt version have lost all key type). When you get window (PICTURE 6.3):
1) If you have ECU EEPROM dump file, load it and NEXT. Continue to finish make dealer key
2) If you know ISN, select Known ISN type, type 16 bytes ISN and NEXT. Continue to finish make dealer key
3) If you have either the ECU EEPROM dump nor ISN value, we don’t support make dealer key
u Success make dealer key need about 30 seconds, the window may frozen at this time, just wait complete. After complete make dealer key, there’s no new dump file. You only need put the new key nearby ignition switch, and try to switch ignition ON, car will learn new key automatically. Sometimes you need do this for several times. If the car can’t learn the key, enter into Key Learn and make sure your key position is not disabled. If it have disable status, you must enable it before learn
(PICTURE 6.8)
7. Unlock Key
u Unlock function support unlock key prepared for CAS1/CAS2/CAS3/CAS3+
u Support load key info to unlock key
u Support load CAS1, CAS2, CAS3, CAS3+, CAS3+ EEPROM to unlock key
u Attention: After CAS4 key made successfully, don’t support unlock
u Attention:About unlock keyless key
Ø File Make Key: Keyless key made by add key with working key don’t support unlock
Ø OBD Key Learn->Prepare dealer key with programmer: Keyless key made by add key with working key don’t support unlock
8. File Change KM
u Support type:EWS3, EWS4, CAS1, CAS2, CAS3, CAS3+, CAS4 (0L15Y), CAS4 (5M48H). CAS3+ encrypt version select CAS3+ type, EWS1/EWS2 don’t support change KM
u Change KM for EWS/CAS: It’s very easy. Load EEPROM dump accord the type, inut new KM, press button Change KM and save new EEPROM dump (PICTURE 8.1)
(PICTURE 8.1)
u CAS1/CAS2/CAS3/CAS3+ change KM steps:
1) Write down the KM shown in instrument, take instrument away from car, avoid synchronize KM with CAS
2) Set CAS KM to 0km (you can do this via OBD or EEPROM dump)
3) Read instrument EEPROM dump with BDM programmer, usually it use M35080 chip
4) Select File Change KM ->M35080 (Instrument) and load EEPROM dump saved in step 3) (PICTURE 8.2)
Note: this type have 2 algorithm for KM, Algo 1 and Algo 2,you need try different algorithm to check the Old KM in file value, which one is nearby the KM (write in step 1)), which is the right type. Change new KM with the right type
5) Input new KM
6) Press button “Change KM” and save new EEPROM dump
7) Write new EEPROM dump to M35080 chip
8) Put your instrument in car
9) Finished
(PICTURE 8.2)
u F-Series(CAS4 system) change KM steps:
1) Write down the KM shown in instrument, take instrument away from car, avoid synchronize KM with CAS
2) et CAS KM to 0km (Change KM with File Change KM, select type with mask, support 1L15Ymask and 5M48H mask)
3) Read instrument EEPROM dump with BDM programmer
4) Select File Change KM ->F-Series Instrument and load EEPROM dump saved in step 3) (PICTURE 8.3).
5) Input new KM
6) Press button “Change KM” and save new EEPROM dump
7) Write new EEPROM dump to instrument
8) Put your instrument in car
9) Finished
(PICTURE 8.3)
9. CAS Repair
9.1. CAS1 (0K50E) OBDII Repair
For suddenly condition cause CAS1 enter service mode while read CAS1 EEPROM via OBDII or CAS PLUG (such as power failure), you can select this type to fix
9.2. ISTA-P4* OBDII Repair
u For suddenly condition cause CAS enter service mode while update ISTAP flash,select this type to fix (PICTURE 9.1)
u You need know CAS ID before continue. You can input the known CAS ID or load EEPROM for automatic search CAS ID
u Use the known CAS ID to repair: Before update CAS flash, we ask you to write down the CAS ID. Type CAS ID here and continue. Of course, you can get CAS ID with Connect in (PICTURE 4.1)
u Use the CAS EEPROM to repair: If can’t read CAS ID, you need have the CAS EEPROM dump file
u Connect SVDI2 to car via OBDII before continue
(PICTURE 9.1)
10. CAS PLUG
10.1. CAS PLUG Overview
CAS PLUS (PICTURE 10.1) is not a standard device, need buy for extra. You can connect your dealer for help. Also you can connect line manually to realize CAS PLUG, see chapter 10.3 CAS PLUG introduction:
u (PICTURE 10.1) line 1: connect to SVDI2 OBDII
u (PICTURE 10.1) line 2: supply 12V power
u (PICTURE 10.1) line 3: EWS line 3
u (PICTURE 10.1) line 4: EWS line 4
u (PICTURE 10.1) line 5: CAS1/CAS2 interface
u (PICTURE 10.1) line 6: CAS3/CAS3+ interface
(PICTURE 10.1)
10.2. Make old CAS PLUG work on SVDI2
Old CAS PLUG can’t use directly in SVDI2. You need open OBD head in CAS PLUG (Unscrew four screws), follow (PICTURE 10.2) (PICTURE 10.3) In (PICTURE 10.2), take line 2 off CAS PLUG, Line 1 PCB head connect to Line 2 PCB head After that, you can see (PICTURE 10.3)
(PICTURE 10.2) original CAS PLUG
(PICTURE 10.3) CAS PLUG works on SVDI2
10.3. CAS PLUG connect to EWS/CAS
u CAS PLUG connect to EWS (PICTURE 10.4) and (PICTURE 10.5)
(PICTURE 10.4)
(PICTURE 10.5)
u CAS PLUG connect to CAS1/CAS2 (PICTURE 10.6)
(PICTURE 10.6)
u CAS PLUG connect to CAS3/CAS3+ (PICTURE 10.7)
(PICTURE 10.7)
10.4. Manual line to achieve CAS PLUG
u Connect marking definition in CAS to SVDI2 OBDII marking definition,provide 12V power
u SVDI2 OBD marking definition (PICTURE 10.8)
(PICTURE 10.8)
u CAS1/CAS2 marking definition(PICTURE 10.9)
(PICTURE 10.9)
u White CAS2, CAS3, CAS3+ marking definition (PICTURE 10.10)
(PICTURE 10.10)
SVDI2 – Transponder
Programmer User Manual
1. Document Declaration. 1
2. Overview.. 1
2.1. Noun explanation. 1
2.2. Options. 1
2.3. Transponder Programming. 2
2.4. Special Transponder. 2
2.5. Immobilizer Data Tool 2
2.6. Other Key Tool 2
2.7. Prepare Remote. 2
2.8. Remote frequency test. 3
2.9. IC Chip Program.. 3
3. Options. 3
3.1. Choose Language. 3
3.2. Antenna Parameters. 3
4. Transponder Programming. 4
4.1. Autodetect Transponder. 4
4.2. PCF7930/PCF7931/PCF7935. 5
4.3. HITAG2. 6
4.4. HITAG2+ EE. 9
4.5. HITAG2 Extended. 9
4.6. HITAG3. 10
4.7. HITAG Pro. 11
4.8. HITAG (BMW) 11
4.9. HITAG (VAG) 12
4.10. MEGAMOS 13. 13
4.11. MEGAMOS 48. 14
4.12. MEGAMOS 8E. 15
4.13. TEMIC 11/ TEMIC 12. 16
4.14. TEMIC 8C. 16
4.15. TIRIS 4C. 17
4.16. TIRIS DST 4D/TIRIS DST 4E. 18
4.17. TIRIS DST+. 19
4.18. T5/TK5551. 20
5. Special Transponder. 21
5.1. Mainly function. 21
5.2. Support Type. 22
5.3. Some Special Transponder Note. 25
6. Immobilizer Data Tool 27
6.1. Mainly function – Make a working key. 27
6.2. Support Car Type. 28
6.3. Special Note. 31
7. Other Key Tool 32
8. Prepare Remote. 36
8.1. Prepare new remote key. 36
1. Document Declaration
Please view the following declaration carefully:
u SVDI2 – Transponder Programmer User Manual can help you maintenance vehicles and read/write transponder with SVDI2 device. Please DON’T used for illegal purpose, Please follow the national law
u SVDI2 – Transponder Programmer User Manual is written by SVDI2, please DON’T used for commercial purposes without authorize
u SVDI2 –Transponder Programmer User Manual can help you how to use Transponder Programmer software, please view carefully
u Any illegal use SVDI2 –Transponder Programmer User Manual, illegal use SVDI2 device, The user should take all risks, the company does not assume any responsibility
2. Overview
2.1. Noun explanation
u Transponder: immo transponder, the transponder inside key, sometimes we call it chip
u sub-remote-pcb: the remote PCB, used in Prepare Remote function. After write data with remote programmer, it can adapt to car for remote function
u Remote Programmer: It is not standard device, This device can connect to DB15 in SVDI2, it can prepare remote key with sub-remote-pcb
u Byte: a decimal value between 0-255, but we can’t input decimal value, we input hex value, every byte between 00-FF.Note: For the byte use in transponder, every input character must belong to 0, 1, 2, 3, 4, 5, 6, 7, 8, 9, A, B, C, D, E, F
2.2. Options
Detail can be found in chapter 3 Options
u Choose Language
2.3. Transponder Programming
Detail can be found in chapter 4 Transponder Programming Support auto detect transponder type, support following types:
1) PCF7930/PCF7931/PCF7935
2) HITAG2
3) HITAG2+ EE
4) HITAG2 Extended
5) HITAG3
6) HITAG Pro
7) HITAG (BMW)
8) HITAG (VAG)
9) MEGAMOS13
10) MEGAMOS48
11) MEGAMOS8E
12) TEMIC 11/TEMIC 12
13) TEMIC 8C
14) TIRIS 4C
15) TIRIS DST 4D/4E
16) TIRIS DST+
17) T5/TK5551
2.4. Special Transponder
Detail can be found in chapter 5 Special Transponder This function can prepare a blank transponder to special one, just as key ordered by dealer, it can be learned to car with PIN
2.5. Immobilizer Data Tool
Detail can be found in chapter 6 Immobilizer Data Tool This function can make a working key directly with immobox EEPROM dump. Support most of the car manufacture
2.6. Other Key Tool
Detail can be found in chapter 7 Other Key Tool Mainly include unlock key, VAG searching 7th bytes CS, VAG prepare dealer with 7 bytes CS, Change MEGAMOS 48 ID etc
2.7. Prepare Remote
Detail can be found in chapter 8 Prepare Remote This function use Remote Programmer write special data to sub-remote-pcb, make sub-remote-pcb become an original remote key, it can adapt to car for remote function
2.8. Remote frequency test
Just provide power to SVDI2, place remote key on CHECK area, CHECK area is on SVDI2 device, Press button “F”, then press any button of your remote key, the frequency and type will display on SVDI2 LCD display
2.9. IC Chip Program
Attention: this function not support now
3. Options
3.1. Choose Language
Support following languages:
u Chinese (Simplified)
u English
Please manual set user language after first run program
3.2. Antenna Parameters
You can make the antenna more stable with change gain value (PICTURE 3.1) For every key is different from each other, the transponder is different position in the key, Thus will cause bad answer while access transponder. You can change antenna gain to large the sensing range, make antenna access the far away transponder Antenna gain value can be 0, 1, 2, 3 When gain value smaller, the sensing range will be small and lower. If the transponder position is higher from antenna, the access may failed When gain value larger, the sensing range will be large and higher. If the transponder position is lower from antenna, the access may failed Simply: If the transponder position is far away from antenna, you need select higher gain for access, example: 2 or 3 If the transponder position is nearby or in antenna, you need select lower gain for access, example: 0 or 1
(PICTURE 3.1)
4. Transponder Programming
Support following types:
1) Autodetect Transponder
2) PCF7930/PCF7931/PCF7935
3) HITAG2
4) HITAG2+ EE
5) HITAG2 Extended
6) HITAG3
7) HITAG Pro
8) HITAG (BMW)
9) HITAG (VAG)
10) MEGAMOS13
11) MEGAMOS48
12) MEGAMOS8E
13) TEMIC 11/TEMIC 12
14) TEMIC 8C
15) TIRIS 4C
16) TIRIS DST 4D/4E
17) TIRIS DST+
18) T5/TK5551
4.1. Autodetect Transponder
(PICTURE 4.1)
Input transponder to SVDI2 programmer, press button “Autodetect Transponder”, it will detect transponder type and simple status information. You can turn to specify type after success read (PICTURE 4.1). Autodetect Transponder function can run without software, just provide power to SVDI2, press button “T” on the device, transponder type will show in the LCD display
4.2. PCF7930/PCF7931/PCF7935
Many old cars use this transponder as immo transponder, this transponder support generate many types special transponder. It mainly contains Password, Main memory, Shadow memory etc. Note: PCF7930 and PCF7931dont have Shadow memory, only have Main memory. PCF7935 have this 2 memory both. Shadow memory only has 16 bytes Write: You need read transponder success before write, modify the position to your expect value, the byte will change read after edit, then write to transponder (PICTURE 4.2)
(PICTURE 4.2)
Ø Read Transponder: Read Main memory don’t require password
Ø Write: For the transponder enabled Password feature, you must place correct password in Password area before write
4.3. HITAG2
HITAG2 is very popular immo transponder (PICTURE 4.3), it is compatible with PHILIPS PCF7936 transponders. It support following types: PCF7936 PCF7941 PCF7942/44 PCF7943 PCF7945 PCF7946 PCF7947 PCF7952 PCF7953 PCF7961 (There’s some other HITAG2 transponder made by small company, it don’t have the above type, but also support) Access method:
Ø PCF7936 support Password mode and Cipher mode
Ø Other’s don’t have Password mode itself, only have Cipher mode
Ø For Password mode: Only SK low was used for login,Default key:4D494B52
Ø For Cipher mode: It use SK low and SK high for login, Default key: SK low:4D494B52; SK high: 4F4E
Coding method:
Ø Support Manchester and Biphase coding (Note: Most immo transponder use Manchester coding, rarely use Biphase type)
(PICTURE 4.3)
u Read Transponder
It will read all readable page and shown in window (Transponder information, Transponder data, Remote control(not all transponder have this area)),it will try password mode and cipher mode automatically, also Manchester and Biphase automatically. For the transponder with default key we can read all readable pages. If the transponder was changed SK value, we can only read ID before you input correct SK value in Parameter. Every page in HITAG2 has 4 bytes. The type is detect with identifier, so it will not strictly for many OEM keys
u About the transponder manufacture configuration(TMCF)
TMCF byte is very important; usually it is the first byte in Config page. Example: Config page is “XXYYZZWW” (4 bytes). The first byte “XX” is TMCF,write error TMCF value can lock the transponder or damage it. The specify explanation for TMC following: Convert XX(hex) to binary, it have 8 bits, every bit can be 0 or 1, we set as: X1 X2 X3 X4 X5 X6 X7 X8
Ø X1: If set to 1, the SK low and SK high was unable to read and write
Ø X2: If set to 1, the Config page was unable to write, but read is always available
Ø X3: If set to 1, Remote control area was unable to read and write(Note: PCF7936 have none about this bit)
Ø X4: If set to 1, transponder data was unable to write, but read is always available
X5: If set to 1, transponder is use transponder data area. If set to 0, mean use remote control area (Attention: For PCF7936, if set to 1, transponder use Cipher mode, if set to 1, transponder use Password mode)
Ø X6: Always 0, reserve bit (Attention: PCF7936 must set to 1, set to 0 will damage transponder)
Ø X7: Always 0, reserve bit (Attention: PCF7936 must set to 1, set to 0 will damage transponder)
Ø X8: If set to 0, transponder use Manchester coding, if set to 1, use Biphase coding (CDP)
How to change a byte to binary: With PC system Calculator ->Select Scientific->Select Hex ->input TMCF value ->Select Bin, you can see the binary values. If binary not have total 8 bits, means the front have several 0 Example: TMCF value is C8, so X1-X8 have value: 11001000 The transponder use Manchester coding The transponder use transponder data area The SK low and SK high was unable to read and write The Config page was unable to write, but support read
4.4. HITAG2+ EE
Support read EEPROM data for PCF7952, PCF7945, PCF7953 etc. (Note:Standard access method for HITAG2+ EEPROM, just like Hyundai, Kia keys. BMW key not belong to this type) (PICTURE 4.4)
(PICTURE 4.4)
4.5. HITAG2 Extended
Support read/write EEPROM data for HITAG2 Extended transponder, mainly used n GM cars. You can read with SK values. Enable SK will read more data compared with not enable SK Write: You need read transponder success before write, modify the position to your expect value, the byte will change read after edit, then write to transponder (PICTURE 4.5)
(PICTURE 4.5)
4.6. HITAG3
Support read EEPROM data for HITAG3 (Some new key in Nissan use this type) (PICTURE 4.6)
(PICTURE 4.6)
4.7. HITAG Pro
HITAG Pro transponder, now we know BMW F-Series keys, new Porsche keys belong to this type. Support read EEPROM data (PICTURE 4.7)
(PICTURE 4.7)
4.8. HITAG (BMW)
Support read/write EEPROM data for BMW remote (keyless) keys. Write: You need read transponder success before write, modify the position to your expect value, the byte will change read after edit, then write to transponder(PICTURE 4.8)
(PICTURE 4.8)
4.9. HITAG (VAG)
HITAG (VAG) is a special transponder for VAG immo5 keys. It can read EEPROM data. As we know, A4/A5/A6/A7/A8/Q5/Touareg cars with immo5 system use this type key (PICTURE 4.9)
(PICTURE 4.9)
4.10. MEGAMOS 13
MEGAMOS 13 only have a data stream. Support copy transponder: Just write the transponder identifier to the simulate transponder (T5 or PCF7935) (PICTURE 4.10)
(PICTURE 4.10)
4.11. MEGAMOS 48
MEGAMOS 48 have 16 pages(PICTURE 4.11), We can read Page0-Page4, Page15-Page12. Other pages only have write operation. Every page has 2 bytes
(PICTURE 4.11)
u Read Transponder
Read identifier (Page3/Page2), config page (Page1, Page0) and user page (Pager15-Page12) If page 1 shown with red mean the transponder is locked. You can’t write any data to locked transponder About change MEGAMOS 48 identifier: see Change megamos 48 ID in chapter 7 Other Key Tool
u PIN / Unlock
The PIN code is stored in Page11, Page10,this 2 pages is write only page. You can lock the transponder to blank one with button “Unlock” and correct PIN code Attention: Electronic MEGAMOS 48 made by VAG don’t support unlock operation
u Crypto Key
MEGAMOS 48 have 12 bytes crypto key, stored in page9-page4 Input correct key in page9-page4 (not write, only input), Press button “Verify”, you can verify the crypto key with values stored in transponder
4.12. MEGAMOS 8E
MEGAMOS 8E transponder (PICTURE 4.12), mainly contain identifier, Data area, Crypto key area. This transponder usually used in A6/Q7/Allroad (EZS-Kessy J518 4th immobilizer system)
(PICTURE 4.12)
Ø Read Transponder: It can read identifier, and 8 pages data area. Every page has 2 bytes
Ø Crypto key area: This area only support write. It contain the crypto key, total 12 bytes
Ø Unlock: You can unlock the transponder to blank with correct crypto key
Ø Check Blank: Check transponder locked or not, the transponder will locked immediately after write crypto key
4.13. TEMIC 11/ TEMIC 12
TEMIC 11和TEMIC 12芯片非常接近, 通讯方式略有不同. 对于标准的芯片来说, TEMIC 11芯片默认头部为BEFA, TEMIC 12芯片默认头部为660F或66F0. 可以使用自动搜索,也可以通过移位功能手动搜索(PICTURE 4.13). 此芯片只有一个数据流信息, 支持芯片拷贝. 拷贝只要把原始芯片ID写入到T5模拟芯片中
(PICTURE 4.13)
4.14. TEMIC 8C
TEMIC 8C芯片只有一个数据流信息(PICTURE 4.14)
(PICTURE 4.14)
4.15. TIRIS 4C
TIRIS 4C only have a Data stream (PICTURE 4.15) Support copy transponder: Just write the Tiris 4C data to TIRIS 4C or TPX1
(PICTURE 4.15)
4.16. TIRIS DST 4D/TIRIS DST 4E
TIRIS DST 4D is very similar with TIRIS DST 4E,they have same data area and algorithm, crypto key is 40 bit(5 bytes) stored in page 4. The only different is they have different coding method, so this 2 transponder can’t instead each other (PICTURE 4.16)
(PICTURE 4.16)
u Read Transponder: Read Page1-Page4 (default key can read for page4) and get lock status. If the page was locked, you can’t write data anymore. Page3 usually use as identifier, it combined with 3 bytes Serial and 1 bytes manufacture code
u Write: Write data to unlock page. Page1 and Page2 have 1 byte, Page3 have 4 bytes, Page4 have 5 byes
u Lock: It can protect the page for write operation
u TIRIS crypto verify: This function can verify the stored crypto key (page4) right or not
Ø Check TIRIS response (40 bits): SVDI2 send the seed to transponder and read the crypto value (3 bytes)
Ø Calc TIRIS response (40 bits): SVDI2 have the algorithm for TIRIS 40 bits, we can calculate the seed and key, get right crypto value (3bytes). Compare this value with transponder response value, if they are same, the transponder have same crypto key as you input. (Attention:For some special crypto key, you need check several different seed for the verify)
4.17. TIRIS DST+
TIRIS DST+ support 2 algorithm, one is same as TIRIS DST 4D (40 bits), another is 80 bits (10 bytes) algorithm (Toyota G transponder use this type). It have same coding method with TIRIS DST 4D, so if the transponder deploy to 40 bits method, it can instead TIRIS DST 4D transponder(PICTURE 4.17)
(PICTURE 4.17)
u Read Transponder: Read Page1, Page2, Page3, Page4 (Default key can be read), Page8-Page12, Page29, Page30 and lock status. If the page was locked, you can’t write data anymore. Page3 usually use as identifier, it combined with 3 bytes Serial and 1 bytes manufacture code
u Write: Write data to unlock page. Page1 and Page2 have 1 byte, Page3 have 4 bytes, Page30 have 2 bytes, other’s page all have 5 bytes
u Lock: It can protect the page for write operation
u TIRIS crypto verify: This function only support verify 40 bits method transponder
Ø Ch Check TIRIS response (40 bits): SVDI2 send the seed to transponder and read the crypto value (3 bytes)
Ø Calc TIRIS response (40 bits): SVDI2 have the algorithm for TIRIS 40 bits, we can calculate the seed and key, get right crypto value (3bytes). Compare this value with transponder response value, if they are same, the transponder have same crypto key as you input. (Attention:For some special crypto key, you need check several different seed for the verify)
4.18. T5/TK5551
T5/TK5551 is a very useful transponder; it can simulate many other transponders. The Data area only support write. Simulate require write different config and data. Attention: This transponder is very complex, you’d better not write data manually, use function provide by SVDI2, write error data can damage transponder (PICTURE 4.18)
(PICTURE 4.18)
5. Special Transponder
5.1. Mainly function
Special Transponder, it can prepare a special transponder (original manufacture key). It can be learned to car with PIN code(PICTURE 5.1)
(PICTURE 5.1)
5.2. Support Type
Support following types:
1) TP22 (Seat-CAN) --- Megamos Crypto 48
2) TP23 (Volkswagen-CAN) --- Megamos Crypto 48
3) TP24 (Skoda-CAN) --- Megamos Crypto 48
4) TP25 (Audi-CAN) --- Megamos Crypto 48
5) ID33 Citroen/Peugeot/Fiat/Lancia VALEO --- PCF7935
6) ID33 Fiat BOSCH --- PCF7935
7) ID33 Mazda --- PCF7935
8) ID33 Mitsubishi --- PCF7935
9) ID33 Nissan --- PCF7935
10) ID33 Nissan 2 --- PCF7935
11) ID33 Opel/Vauxhall/Cadillac/Holden --- PCF7935
12) ID33 Opel/Vauxhall/Cadillac/Holden 2 --- PCF7935
13) ID33 Volkswagen --- PCF7935
14) ID40(44) China Cars --- PCF7935
15) ID40 Opel/Vauxhall/Cadillac/Holden --- PCF7935
16) ID41 Nissan --- PCF7935
17) ID42 Volkswagen --- PCF7935
18) ID44 Mitsubishi --- PCF7935
19) ID44 Volkswagen 1 --- PCF7935
20) ID44 Volkswagen 2 --- PCF7935
21) ID45 Peugeot --- PCF7935
22) ID46 China Cars --- PCF7936
23) ID46 VAG --- PCF7936
24) ID46 Nissan X-Trail
25) ID46 Nissan Platina
26) ID46 Nissan Keyless --- Key Card
27) ID46 Infinity Keyless --- Key Card
28) ID46 Nissan Micra --- Remote Key
29) ID46 Nissan Tida --- Remote Key
30) ID46 Renault Master II --- Remote Key
31) ID46 Renault Clio II --- Remote Key
32) ID46 Renault Master II --- Transponder 7936
33) ID46 Renault Trafic II --- Remote Key
34) ID46 Renault Trafic II --- Transponder 7936
35) ID46 Nissan Primastar --- Remote Key
36) ID46 Nissan Primastar --- Transponder 7936
37) ID46 Nissan Interstar --- Remote Key
38) ID46 Nissan Interstar --- Transponder 7936
39) ID46 Opel Astra H / Zafira B --- Remote Key
40) ID46 Opel Corsa D --- Remote Key
41) ID46 Opel Vectra C --- Remote Key
42) ID46 Opel Vivaro --- Remote Key
43) ID46 Opel Vivaro --- Transponder 7936
44) ID46 Opel Movano --- Remote Key
45) ID46 Opel Movano --- Transponder 7936
46) ID46 Opel Movano III --- Remote Key
47) ID46 Renault Master III --- Remote Key
48) ID46 Renault Clio III --- Remote Key
49) ID46 Renault Modus III --- Remote Key
50) ID46 Renault Espace IV --- Transponder 7936
51) ID46 Renault Espace IV --- Key Card 2-buttons
52) ID46 Renault Espace IV --- Key Card 3-buttons
53) ID46 Renault Laguna II --- Transponder 7936
54) ID46 Renault Laguna II --- Key Card 2-buttons
55) ID46 Renault Laguna II --- Key Card 3-buttons
56) ID46 Renault Laguna III --- Key Card
57) ID46 Renault Vel Satis --- Transponder 7936
58) ID46 Renault Vel Satis --- Key Card 2-buttons
59) ID46 Renault Vel Satis --- Key Card 3-buttons
60) ID46 Renault Megane II --- Key Card
61) ID46 Renault Scenic II --- Key Card
62) ID46 Renault Twingo --- Remote key
63) ID46 Renault Twingo --- Transponder 7936
64) ID46 Citroen/Fiat/Lancia/Peugeot --- PCF7936
65) ID46 Citroen/Peugeot --- PCF7936
66) ID46 Citroen/KIA/Hyundai/Peugeot --- PCF7936
67) ID46 Fiat/Iveco --- PCF7936
68) ID46 Renault/Chrysler --- PCF7936
69) ID46 Chrysler CAN bus (Y164,Y170) --- PCF7936
70) ID46 Chevrolet Circle Plus --- PCF7936
71) ID46 Mitsubishi --- PCF7936
72) ID46 Saab
73) ID46 Hyundai Remote key 7946
74) ID46 KIA Remote key 7946
75) ID60 Generic --- Texas 4D
76) ID61 Mitsubishi II --- Texas 4D
77) ID62 Suzuki BIKE --- Texas 4D
78) ID62 Kawasaki BIKE --- Texas 4D
79) ID62 Mitsubishi III --- Texas 4D
80) ID63 Ford/Mazda --- Texas 4D
81) ID64 Chrysler/Subaru --- Texas 4E
82) ID65 Suzuki/Subaru --- Texas 4D
83) ID66 Suzuki --- Texas 4D
84) ID67 Toyota --- Texas 4D
85) ID68 Lexus --- Texas 4D
86) ID69 Yamaha --- Texas 4D.(JMA TP31)
87) ID70 Toyota Europe --- Texas 4D
88) ID70E Toyota Hybrid --- Texas 4D
89) ID73 Mitsubishi --- PCF7935
90) ID8C Ford/Mazda --- Temic 8C
91) ID8C Proton --- Temic 8C
92) Mercedes Benz G- Class --- PCF 7930
93) Mercedes Benz C- Class/E- Class --- PCF 7930
94) Mercedes Benz ML --- PCF 7930
95) VW Jetta 2010 (China) --- Megamos Crypto 48
5.3. Some Special Transponder Note
u ID40(44) China cars --- PCF7935: this type need select sub type: Chery, Geely, Great Wall, Haima, ChangAn (PICTURE 5.2)
(PICTURE 5.2)
u ID46 China cars --- PCF7936: this type need select sub type: Chery, Geely, Great Wall, Haima, Zotye Auto, Maple Auto, Zhonghua 530, Zhonghua 230 (PICTURE 5.3)
(PICTURE 5.3)
u ID67(Toyota)/ID68(Lexus)/ID70(Toyota-Euro)/ID70E(Toyota Hybrid) --- TIRIS 4D: this type need select key position: Master key1, Master key2, Master key3, Master Key4, Valet Key1, Valet Key2 (PICTURE 5.4)
(PICTURE 5.4)
6. Immobilizer Data Tool
6.1. Mainly function – Make a working key
Immobilizer Data Tool, simply name write start. It can load car immobox EEPROM dump, make a working key directly. Provide detail transponder type and EEPROM type accord selected car (PICTURE 6.1): car original transponder, require new transponders, EEPROM chip, EEPROM size etc How to make a working key with immobox EEPROM dump file, steps:
1) Load immobox EEPROM dump (BIN file) with Load EEPROM dump…, it will display used key ID, key number, and PIN(if it have) etc
2) Select a key position for new key
3) Input a blank key to SVDI2 programmer, Press button Make Dealer Key
4) After make key success, if you get save new EEPROM window, you need write new dump file to immobox to make new key working(Expect there’s special note). If there’s no save new EEPROM window, the made key can start engine directly
(PICTURE 6.1)
6.2. Support Car Type
Support following types:
u Asia
Ø Acura
Ø Brilliance
Ø Besturn
Ø Chang An
Ø Great Wall
Ø Chery
Ø Daewoo
Ø Daihatsu
Ø Geely
Ø Haima
Ø Honda
Ø Hyundai
Ø Infiniti
Ø Isuzu
Ø Kawasaki
Ø Kia
Ø Lexus
Ø Mazda
Ø Mitsubishi
Ø Nissan
Ø Proton
Ø SaicMotor
Ø Saipa
Ø IKCO
Ø SsangYong
Ø Subaru
Ø Suzuki
Ø Tata
Ø Toyota
Ø Yamaha
u Euro
Ø Alfa Romeo
Ø Aprilia
Ø Aston Martin
Ø Audi
Ø Bentley
Ø BMW
Ø Citroen
Ø Dacia
Ø DAF
Ø Ducati
Ø Ferrari
Ø Fiat
Ø Gilera
Ø Iveco
Ø Jaguar
Ø Lancia
Ø LDV
Ø MAN
Ø Maserati
Ø Mercedes Benz
Ø Opel
Ø Peugeot
Ø Piaggio
Ø Polonez
Ø Porsche
Ø Renault
Ø Rover
Ø Saab
Ø Scania
Ø Seat
Ø Skoda
Ø Smart
Ø TagAZ
Ø UAZ
Ø VAZ
Ø Volvo
Ø VW
u USA
Ø Buick
Ø Bombardier
Ø Cadillac
Ø Chevrolet
Ø Chrysler
Ø Dodge
Ø Ford
Ø GMC
Ø Jeep
Ø Lincoln
Ø Oldsmobile
Ø Pontiac
6.3. Special Note
u You’d better use VVDI Programmer for read Immobox EEPROM dump file
u When you save new EEPROM dump, DON’T write to original dump file, save a new name
u For VAG CDC32xx type, some type need FLASH for make dealer key
u For BMW CAS3+ encrypt version, we need working key, engine EEPROM dump or ISN support (PICTURE 6.2)
u For some special immobox, SVDI2 can fix the crashed EEPROM dump to new one. Please load new saved EEPROM dump and make key
u Porsche support Erase key, after ease key will save new dump. Make dealer key should load new dump (PICTURE 6.3)
(PICTURE 6.2)
(PICTURE 6.3)
7. Other Key Tool
Mainly include following types, there will be a steps after select one item
u Unlock – Megamos 48 transponder: Unlock all dealer key prepared by SVDI2 (Expect electronic MEGAMOS 48) (PICTURE 7.1)
u Unlock – A6/Q7/Allroad Key (MEGAMOS 8E): Require load J518 EEPROM(PICTURE 7.2)
u Unlock – PassatB6/CC 46 transponder key (need 95320 EEPROM): Require comfort module EEPROM dump(95320) (PICTURE 7.3)
u Unlock – PassatB6/CC 46 transponder key (need 6 bytes CS): Require the 7 bytes CS stored in key (PICTURE 7.4)
u Unlock – 5th OEM key (PICTURE 7.5): Now the OEM key is not support unlock, the locked OEM key can prepare new dealer key directly. Just use it as a new one
u Special – VW cars find 7th CS from working key(Megamos 48): (VAG cars) Find 7th byte CS from working key, require known 6 bytes CS (PICTURE 7.6)
u Special – VW cars prepare dealer key with 7 CS(Megamos 48): (VAG cars) Prepare a dealer key with car manufacture and 7 bytes CS (PICTURE 7.7)
u Special – Change megamos 48 ID, need special 48: Change MEGAMOS 48 identifier, require special MEGAMOS 48 transponder. You can make a key support enter in dealer server by change 48 ID to original one(PICTURE 7.8)
(PICTURE 7.1)
(PICTURE 7.2) (PICTURE 7.3)
(PICTURE 7.4) (PICTURE 7.5)
(PICTURE 7.6) (PICTURE 7.7)
(PICTURE 7.8)
8. Prepare Remote
8.1. Prepare new remote key
This function can write special data to sub-remote-pcb via Remote Programmer(PICTURE 8.1). Make sub-remote-pcb have original remote key function (PICTURE 8.2)
u Requires connect Remote Programmer to SVDI2 DB15 Interface. Remote Programmer is not a standard device, you can connect your dealer for detail
u Have offline database, and can update database via internet automatically
u Choose specify remote type, connect Remote Programmer to SVDI2 DB15 interface, and connect another head to sub-remote-pcb. Press “Prepare Remote” and wait end
u After write success, the sub-remote-pcb have same function as original remote key, What you need to do is adapt the sub-remote-pcb to car
u About Prepare from file: If you select this option, it will ask you load a remote file when prepare remote. Attention: the file must get from SVDI2. Write other data may damage sub-remote-pcb
u Feedback: You can feedback any question in prepare remote here. Just write your question and contact method and feedback to SVDI2
(PICTURE 8.1)
(PICTURE 8.2)
| 


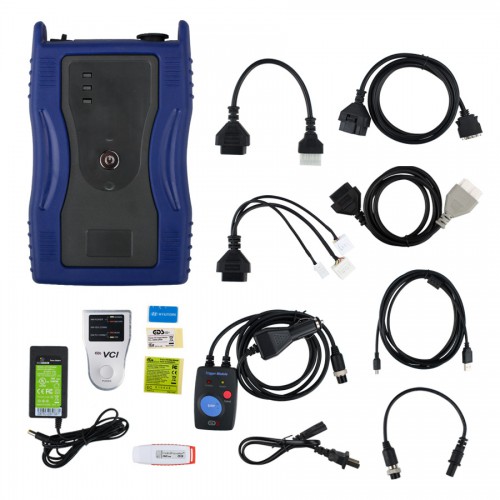


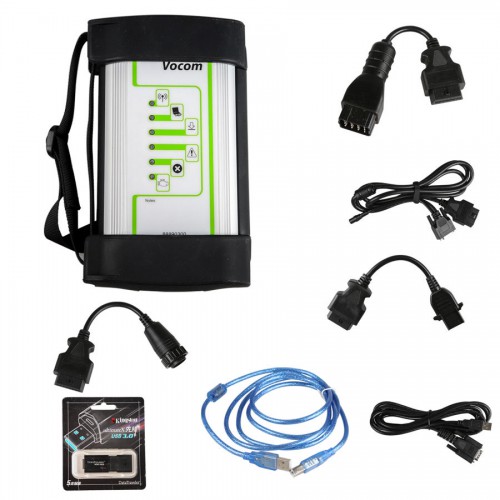
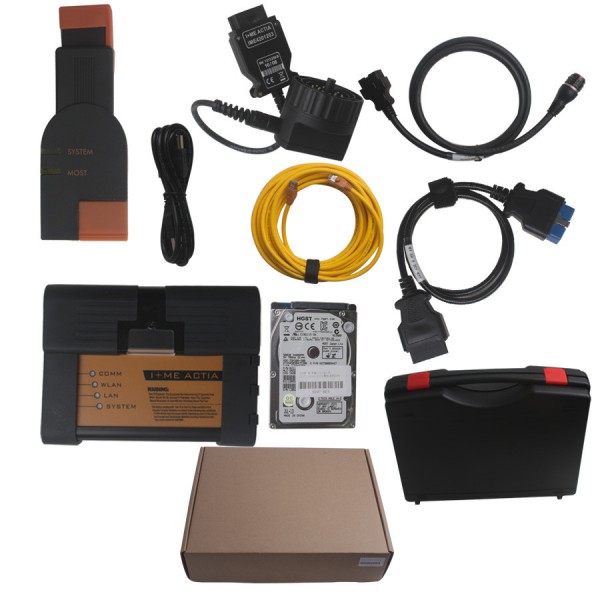


 Payment Account
 Payment Account